1971 Alaskan 8' CO Rebuild

archie71

Member
Joined
Sep 11, 2014
Messages
17
Location
Seattle WA
A couple of you have expressed interest in some rebuild details, so here goes. This is where we started. Much of the interior looked ok at first but there was quite a bit of rot in the usual spots. The rotted wood was more like compost - scooped much of it out with gloved hands. The front panel was gone entirely. I started cutting back. It got a bit more involved than I had anticipated.
 

Attachments

  • IMG_7074002wtwrs.jpg
    IMG_7074002wtwrs.jpg
    231.4 KB · Views: 751
  • IMG_7075003wtwrs.jpg
    IMG_7075003wtwrs.jpg
    92.7 KB · Views: 668
  • IMG_7077019wtwrs.jpg
    IMG_7077019wtwrs.jpg
    89.2 KB · Views: 552
here's a few links for what you're embarking on Archie.....

http://smallutions.com/recent-work/alaskan-camper/

http://campereparadise.com/wp/the-alaskan-camper/

this one was done a while ago but a very nice finish....

http://www.wanderthewest.com/forum/topic/6291-dogwood-a-75-10-cabover-rebuild/

always keep in mind....I'm not alone, I'm not alone

Plus....Ripper's....all should take a look at this one...pawpaw doesn't have to

http://www.expeditionportal.com/forum/threads/147114-Alaskan-Camper-84-14-Build-Thread

and there are lots of non cab over rebuilds here on the back pages

I wish Wes (caseboy) were here...he went through this a few years ago...painfully
 
Hi Rusty, I am actually about done. There were definitely a couple of grim years but she looks pretty good now. Some earlier pictures from earlier in the rebuild.
 

Attachments

  • IMG_7512051wtwrs.jpg
    IMG_7512051wtwrs.jpg
    73.4 KB · Views: 464
  • IMG_7553107wtwrs.jpg
    IMG_7553107wtwrs.jpg
    89.1 KB · Views: 541
  • IMG_7515055wtwrs.jpg
    IMG_7515055wtwrs.jpg
    102.7 KB · Views: 523
Now she looks like this.
 

Attachments

  • DSC00048005wtwrs.jpg
    DSC00048005wtwrs.jpg
    140.4 KB · Views: 610
  • DSC00068018wtwrs.jpg
    DSC00068018wtwrs.jpg
    76.1 KB · Views: 650
  • DSC00054008wtwrs.jpg
    DSC00054008wtwrs.jpg
    98 KB · Views: 572
WOW......I'm interested in the electronics panel....by the refer....Battery and charging monitor?

well done....you guys set the bar pretty high.....

between you and Ripper....talk about deluxe....good job of maintaining the interior integrity while upgrading the rest....
 
With the quality of rebuilds you guys have set the bar very high. I will definitely be relying on your experience. I know my CO has some hidden dry rot but my plan is to try and salvage the interior ash plywood and work from the outside. Second step tonight was to get it off my truck..............The last time I plan on using these Jacks!
 

Attachments

  • IMG_3725B.jpg
    IMG_3725B.jpg
    380.7 KB · Views: 347
you might want to gather together a few pallets....a stack on both ends

you don't want to hear the stories about Alaskans falling off....you'll want to be crawling in and out...the more secure the better
I feel like that camper is another child....LOL

those jacks are a major pain...but they are good for one thing...holding the top section up for replacing hydraulic o-rings in the cylinders...all 4 at the same time

The interior usually tells the tale...and your's is so clean and original....I wouldn't count on finding much in the way of rot...maybe a bit around the vent.....I'd think seriously about just sealing it up and maybe a trim of paint or aluminum to cover the minor staining around the vent....

Pawpaw...you don't find them like that everyday...not even every other day.....most have to go through what Archie has gone through to get that look....or even more...
 
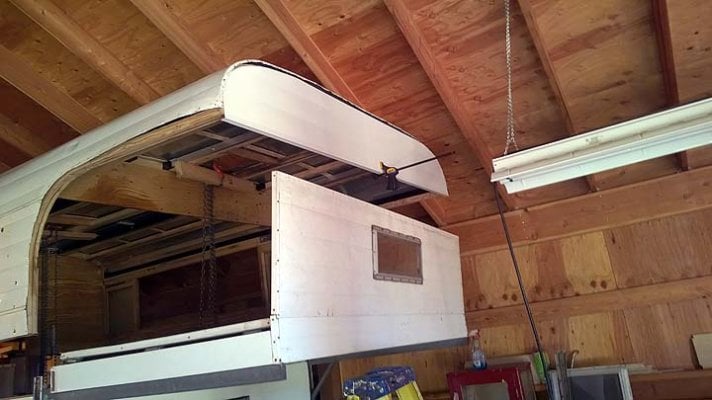
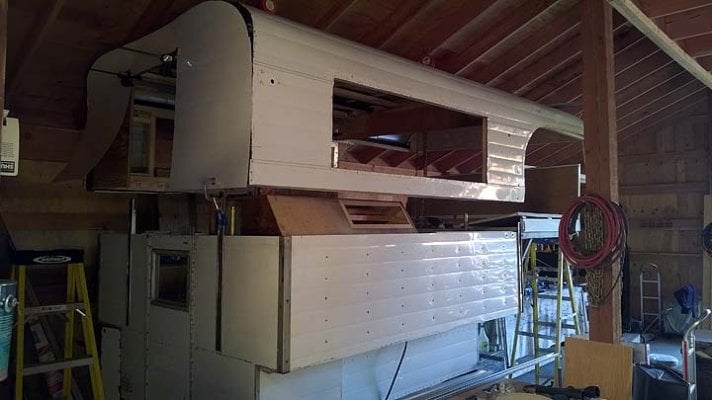
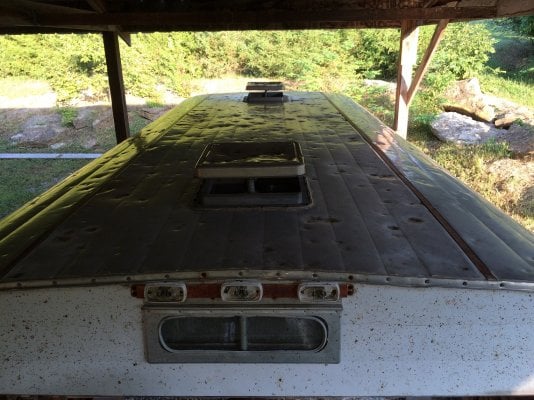
Hi Pawpaw, I would definitely do it Ripper's way if I had to do it again. I thought I would do too much damage to the sheet metal going that route but since I banged it all up anyway (from the inside) I am probably going to reskin at a later date. His idea is just better. I did visit with Bryan Wheat at the new factory in Winlock and he offered to sell me the new sheet metal "kit" for the top. I am hesitant to do that as I am sure my outside dimensions changed a little and would hate to spend the money and end up "short". Maybe I will ask him to cut it all a little long, hopefully not driving up cost too much over the $900 or so. I may just buy more material from Hemet and do it all by hand.

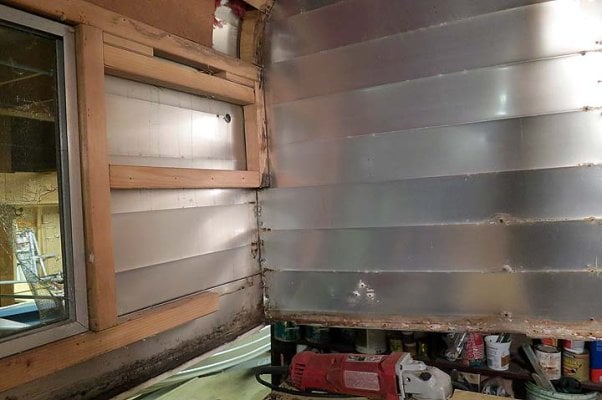
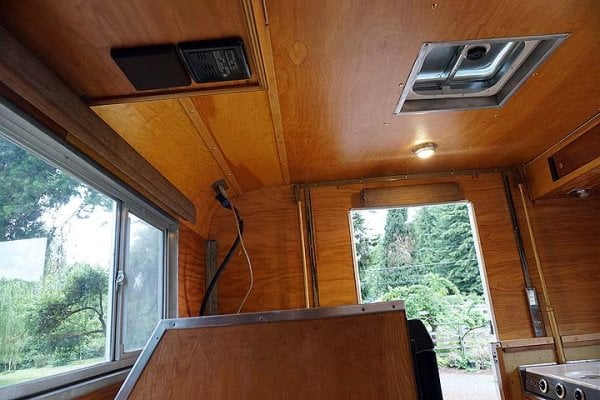
My idea was to use the skin as a sort of template as I built the inside back up again. Less precise than I might have hoped. Oh well. It basically worked out even though my dims are slightly "custom" now.

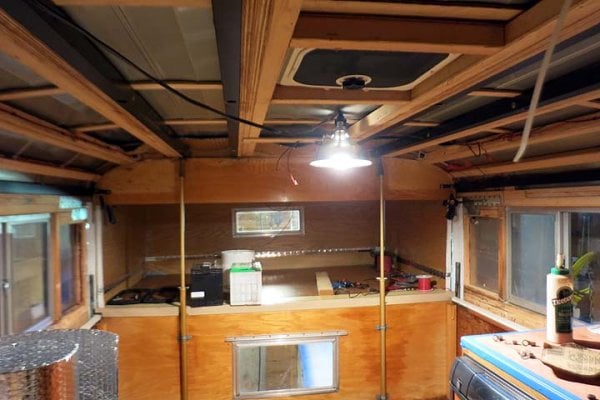
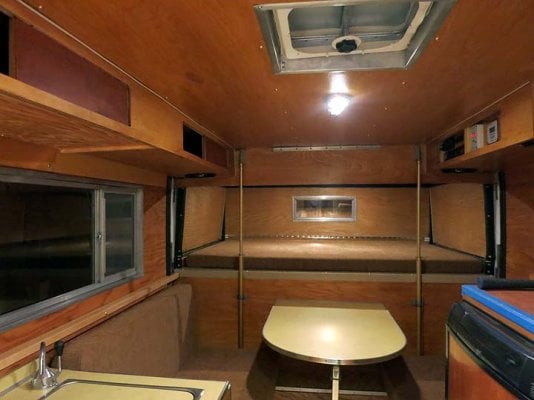
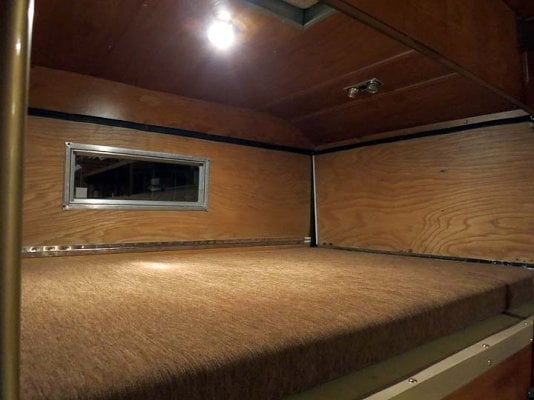
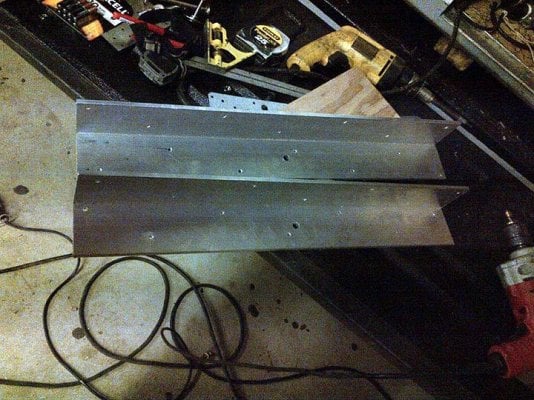
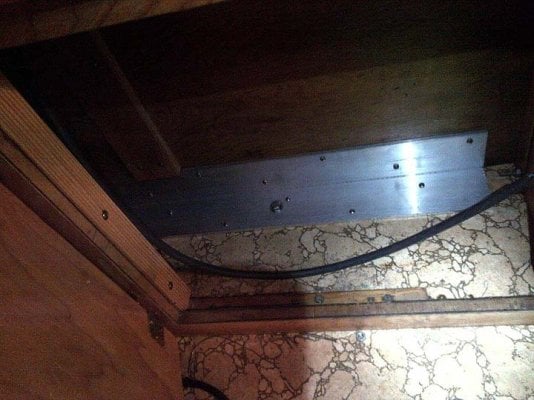
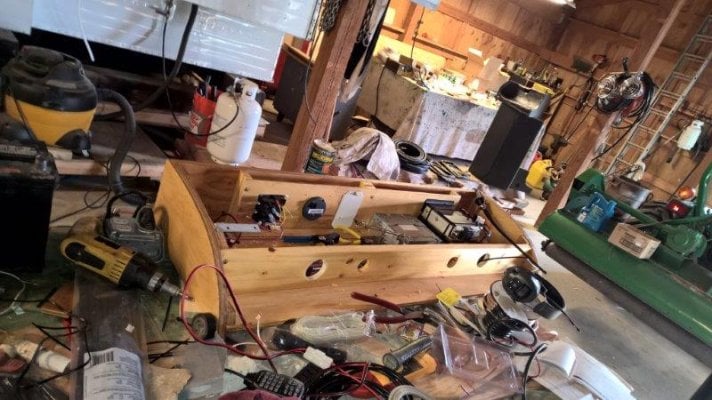
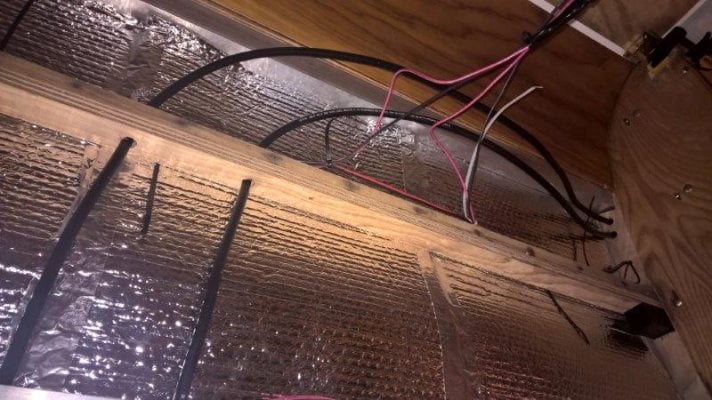
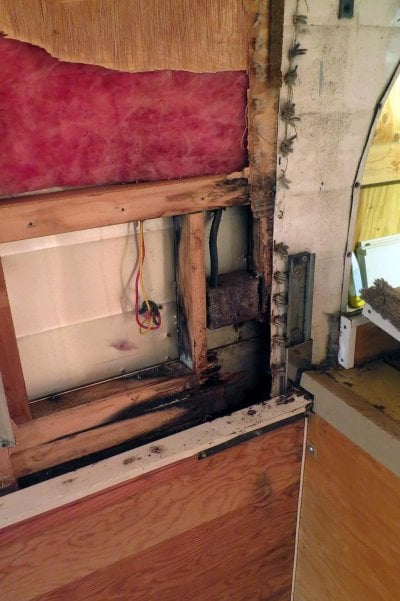
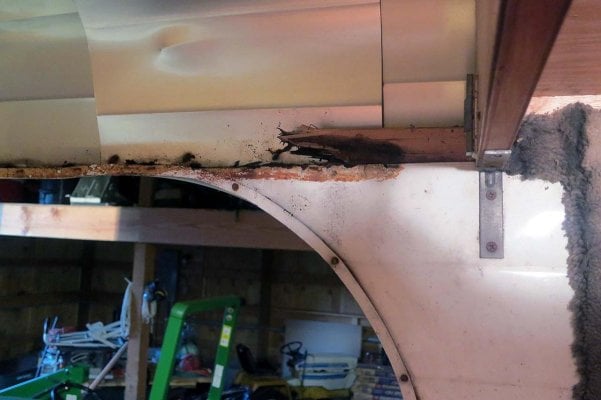
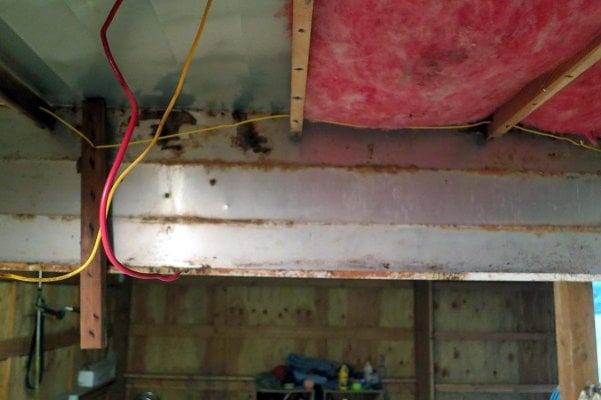
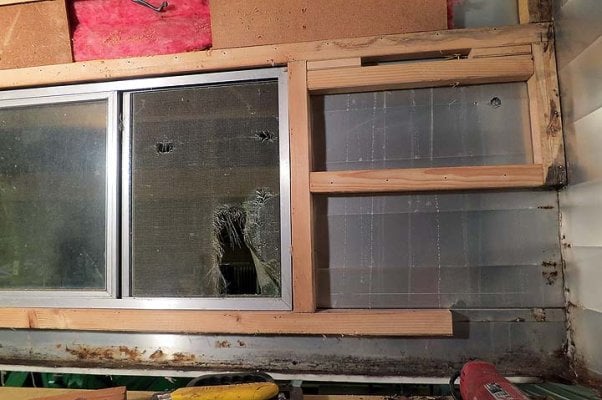
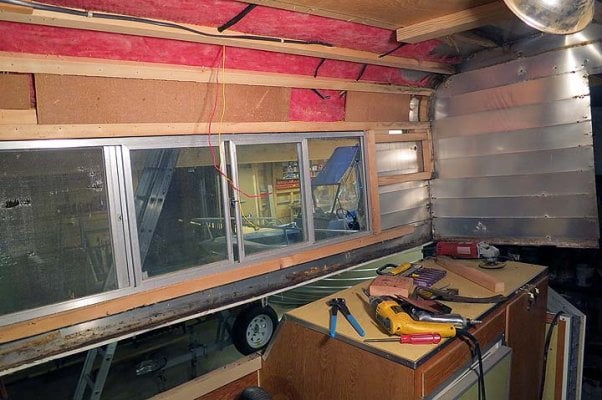
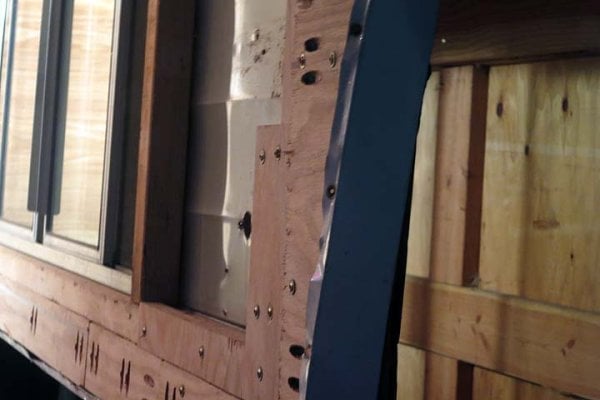
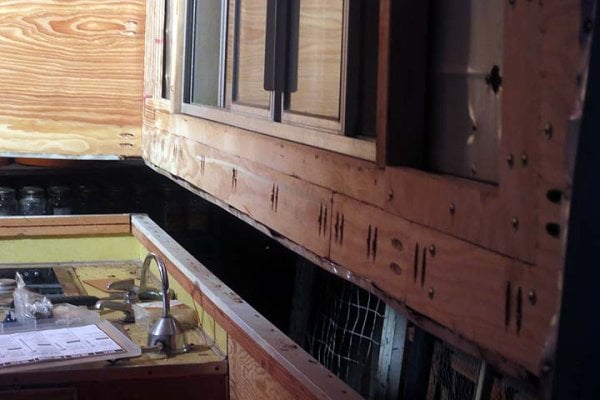
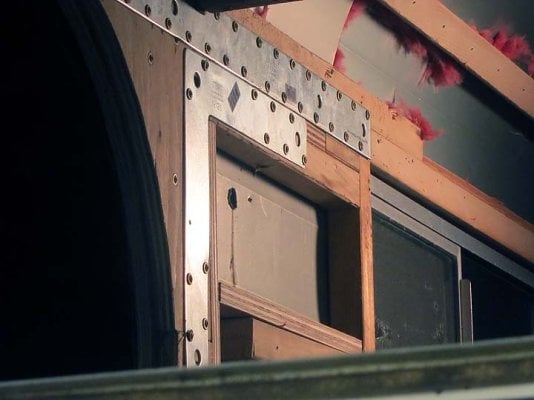
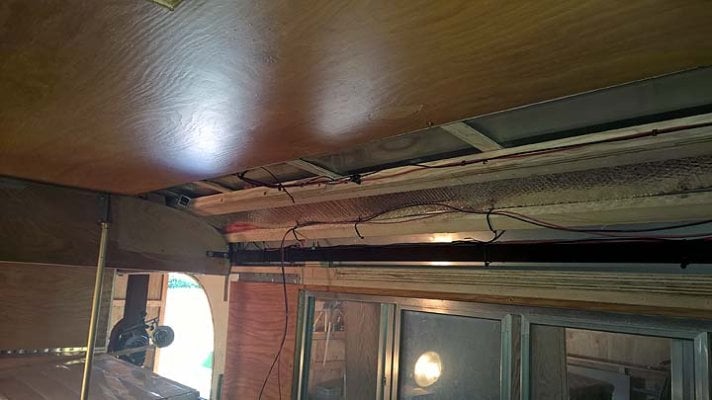
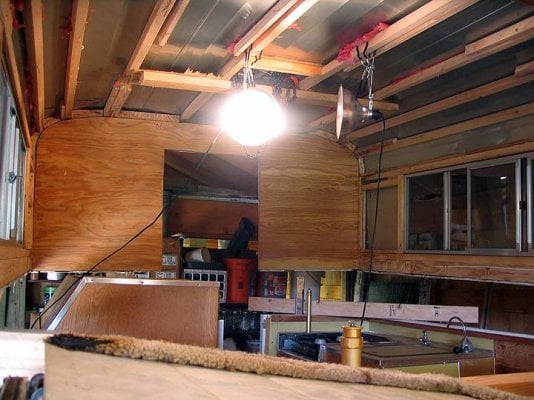
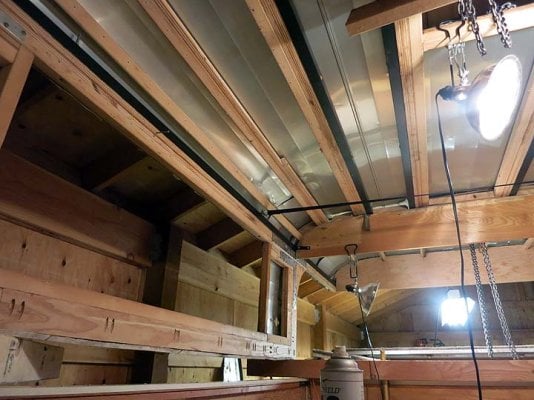
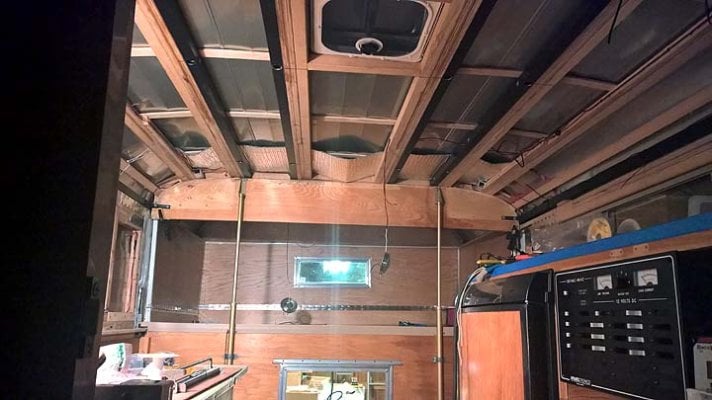
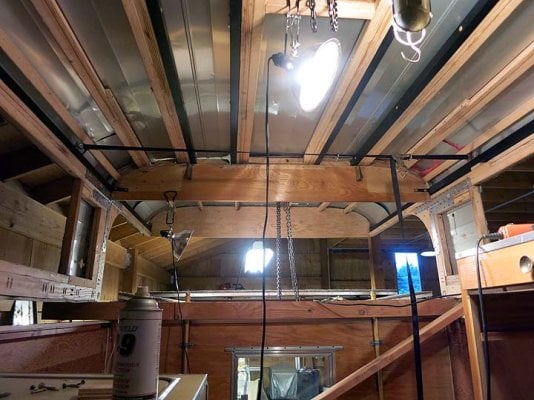
I have attached a few pics of the structural work. You can see I started by tearing out too much, sistering with strips of 3/4" marine ply and finally with some steel and aluminum tube (what was on hand at the time) because the roof was so flexible I felt it needed something more.

The rest is just doubled up 3/4" marine ply to make up the missing pieces, staggering the joints as much as I could. Pocket screws, plus some Simpson Strongtie brackets. I would not do those brackets again. Too heavy, too much drilling headache later, dubious added strength.

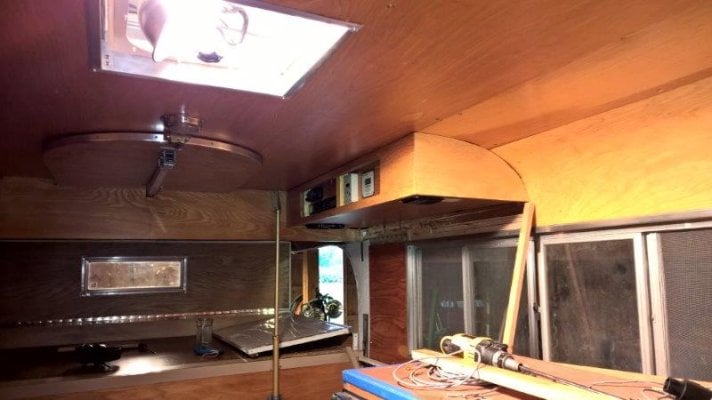
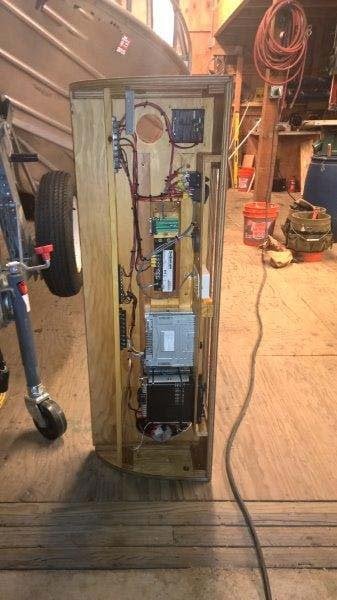
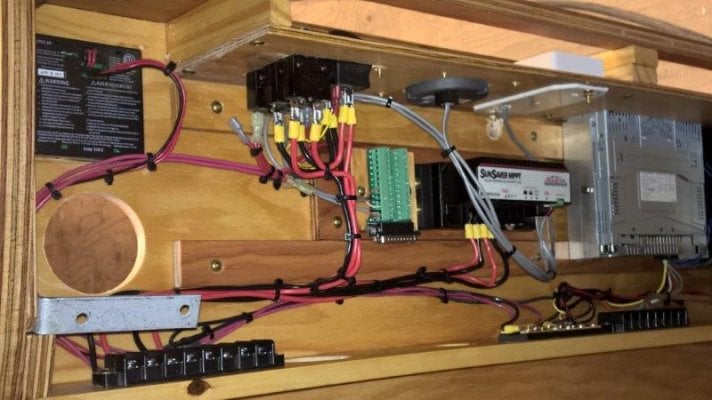
The roof is very heavy now of course so I have separate valves controlling each ram and a new hand pump. It works. If a tad overkill.
 

Attachments

  • IMG_0061wtwrs.jpg
    IMG_0061wtwrs.jpg
    55.8 KB · Views: 466
  • IMG_0062wtwrs.jpg
    IMG_0062wtwrs.jpg
    68 KB · Views: 520
  • IMG_0158wtwrs.jpg
    IMG_0158wtwrs.jpg
    68.6 KB · Views: 526
  • AK June July 15 (1)wtwrs.jpg
    AK June July 15 (1)wtwrs.jpg
    85.7 KB · Views: 503
  • AK June July 15 (3)wtwrs.jpg
    AK June July 15 (3)wtwrs.jpg
    69.1 KB · Views: 503
  • IMG_0967wtwrs.jpg
    IMG_0967wtwrs.jpg
    97.6 KB · Views: 517
and here
 

Attachments

  • IMG_0299wtwrs.jpg
    IMG_0299wtwrs.jpg
    96.2 KB · Views: 283
  • IMG_0300wtwrs.jpg
    IMG_0300wtwrs.jpg
    101.6 KB · Views: 281
  • WP_20150326_19_52_10_Pro__highreswtwrs.jpg
    WP_20150326_19_52_10_Pro__highreswtwrs.jpg
    85.1 KB · Views: 259
  • IMG_0301wtwrs.jpg
    IMG_0301wtwrs.jpg
    105 KB · Views: 247
I'm not so sure I would do it "ripper's way" again :) A gazillion hours and dollars, and my son an i slept in a $34 tent on the ground when we camped a couple weeks ago.
Your rebuild is very nice. I don't think I ever saw anyone do the ship in a bottle approach before:)
 
Ha! Hi Ripper. I guess we all choose our pain. Grass is always greener ;) I do think you are (were?) onto something with the approach of working outside - in. Did you ever get it done?

To answer Rusty's earlier questions.

The electrical panel is a combo 12v/120v panel from Paneltronics in FL. Very expensive marine panel but it was the only thing I could make fit and look like I wanted. I took out the "wardrobe" on the PS rear and put in new drawers to match. Top drawer is a blank that just holds the panel.

The roof tubes are steel (painted black) in the back and aluminum (bare) in the front. For no real reason. Just what I had. I did run two long 1" wide tubes down the sides that lock front panel of CO and rear panel together and put a tab on it at the rear of the CO where the stiffener/header thing goes across. Some in pics to look at, various stages, but shows you the "guts"

And new aluminum for the front and rear of the top going on.
 

Attachments

  • AK June July 15 (1)wtwrs.jpg
    AK June July 15 (1)wtwrs.jpg
    85.7 KB · Views: 243
  • AK June July 15 (3)wtwrs.jpg
    AK June July 15 (3)wtwrs.jpg
    69.1 KB · Views: 268
  • IMG_3799wtwrs.jpg
    IMG_3799wtwrs.jpg
    81 KB · Views: 272
  • WP_20140927_008wtwrs.jpg
    WP_20140927_008wtwrs.jpg
    77 KB · Views: 310
  • WP_20140927_011wtwrs.jpg
    WP_20140927_011wtwrs.jpg
    72.3 KB · Views: 282
Some interior pics. New drawers, new 3 way fridge, newly re-enameled stove top. Inverter, Trimetric meter for eventual solar. Radios. CO2 alarm. New catalytic heater. New cushion covers etc.
 

Attachments

  • IMG_5609wtwrs.jpg
    IMG_5609wtwrs.jpg
    71.4 KB · Views: 298
  • IMG_5602wtwrs.jpg
    IMG_5602wtwrs.jpg
    69.3 KB · Views: 320
  • IMG_5610wtwrs.jpg
    IMG_5610wtwrs.jpg
    58.6 KB · Views: 317
  • IMG_5612wtwrs.jpg
    IMG_5612wtwrs.jpg
    65.6 KB · Views: 290
pretty amazing Archie...just when you think you've seen it all (Rippers)...

Very nice...and well thought out...kudos

the only thing I would have done...since you had all the structural in limbo...relieving the entrance into the CO section as it is done in the newer models...making access alot easier....

no criticism ..amazing job

I'm to old to keep up with yous guys :D ...keep up the good work

AND......thanks for taking all the pictures documenting the track...it's a big deal!!
 
Archie, working on a bare structure certainly makes things like wiring easier, and you don't have to worry about denting the sheetmetal.
Mine is still not done, I slack off in the summer. I need a couple more weekends to get it water tight, at which point I need to get it outside so I can get a large lathe in my shop-shop needs a major reorg to make that happen.
Next spring :)
 
Hi Folks. A couple more pictures. Very curious how many guys are using tie-downs like Torklift etc vs just bolting the camper into the bed. I just bolted it down but added a few brackets/backing plates to "grab" the camper a little more solidly. We will see if it holds together. The previous owner had it bolted so I pretty much used the same holes, added a few and also bolted "lightly" on the sides of the bed. I say lightly because it is not really torqued down. More like loosely positioned. I stuck some 2"x3" aluminum tube on top of the bed, closed off the ends and bolted through. You can still see a little light between the bed top and the tube. Thinking of filling that gap in with gasket material or something similar. Hopefully the truck won't impart forces that shake the camper apart. Only time will tell. Pretty scary using those Reico jacks. I have brand new ones (way overpriced if you ask me) and don't really ever want to use them again. Plan is to keep camper and truck mated up most of the time.
 

Attachments

  • Mating (3)wtwrs.jpg
    Mating (3)wtwrs.jpg
    131.6 KB · Views: 203
  • Mating (6)wtwrs.jpg
    Mating (6)wtwrs.jpg
    87.4 KB · Views: 212
  • Mating (7)wtwrs.jpg
    Mating (7)wtwrs.jpg
    82.8 KB · Views: 255
  • Mating (9)wtwrs.jpg
    Mating (9)wtwrs.jpg
    95.6 KB · Views: 243
Also curious if anyone has run solar wiring through the roof or out the side and if so how they sealed it up. I have wired for solar as far as the electronics box on the PS, shown here but stewing over best weatherproof seal on the roof and prefer not to use an RV style roof box, even a small one, if I can avoid it.
 

Attachments

  • WP_20150919_17_31_02_Pro.jpg
    WP_20150919_17_31_02_Pro.jpg
    80.4 KB · Views: 243
  • WP_20150920_16_49_23_Pro.jpg
    WP_20150920_16_49_23_Pro.jpg
    50 KB · Views: 288
  • WP_20150927_16_34_34_Pro.jpg
    WP_20150927_16_34_34_Pro.jpg
    78.3 KB · Views: 276
  • WP_20151003_08_47_49_Pro.jpg
    WP_20151003_08_47_49_Pro.jpg
    66.2 KB · Views: 277
  • WP_20151003_17_57_05_Pro.jpg
    WP_20151003_17_57_05_Pro.jpg
    64.9 KB · Views: 258
Archie..............The quality shows in your work. Your pictures scream "Handcrafted". Thank you for all the pictures as they will be a tremendous help and inspiration to me when I start on mine. I will be working from the outside in only because of this:
 

Attachments

  • IMG_3738A.jpg
    IMG_3738A.jpg
    445.4 KB · Views: 212

New posts - WTW

Back
Top Bottom