1978 FWC New Owner

Hey Porter,

Sorry I haven't joined in on the chorus by now. As Tim and Shellback have expressed, several of us have been involved with our builds during the same time period. I just wanted to encourage to keep up your excitement and enthusiasm, it will be your driving force to move through the build process. For those who enjoy projects and working with your hands, there is a substantial amount of satisfaction you get on these campers as you complete one phase of the rebuild after another. and down the road, it is another big thrill to finally put the camper to use. Four Wheel Campers are unique in many aspects, and when you rebuild one it is a one of a kind. Anyhow congrats on your find, and good luck on your build. If I can offer any help on anything, just let me know.

A couple of other things. I had the window you're needing, but gave it away already, and disposed of the rest of them as well, so can't help you on that. Like Shellback, I tore my 81 Grandby down to the Frame, and rebuilt it from there, including moving the front wall back one foot so it would fit a 6 1/2 foot bed. When you take yours to the welder, make sure you know what he's charging. Mine was extensive because of a lot of additional metal I added, and took about 11 hours, so it ended up being one of the larger single expenses. It looks like yours will be much less if your just re-welding broken joints is all. One tip is to use a magic marker or Sharpie to highlight where you want welds to be done. It helps if you're not there supervising. The floor pack is not too hard if you take your time and plan it out well. I used 5/8 inch plywood, and it seems adequate. A staple gun and ample glue makes the project come together nicely.

Once again, congrats, and good luck.

Poky
 
More Progress
 

Attachments

  • 0F0787BB-82E8-4ADE-8BFA-B7A9676A1D6B.jpeg
    0F0787BB-82E8-4ADE-8BFA-B7A9676A1D6B.jpeg
    108.7 KB · Views: 129
  • FCBE1277-A13C-4103-B277-24F2BCDFA81D.jpeg
    FCBE1277-A13C-4103-B277-24F2BCDFA81D.jpeg
    122.4 KB · Views: 129
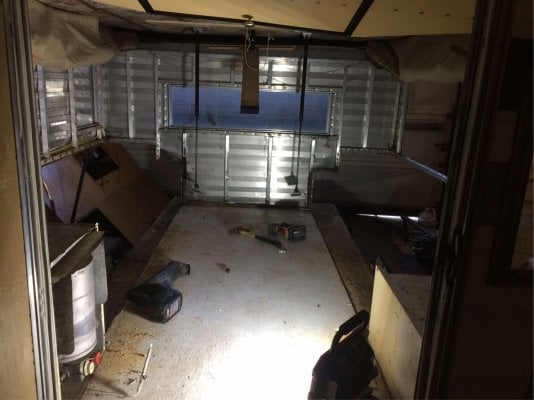
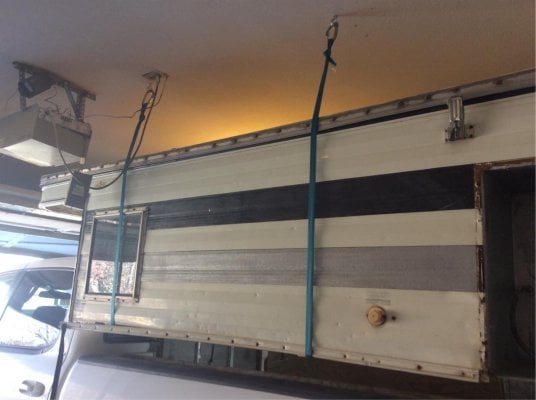
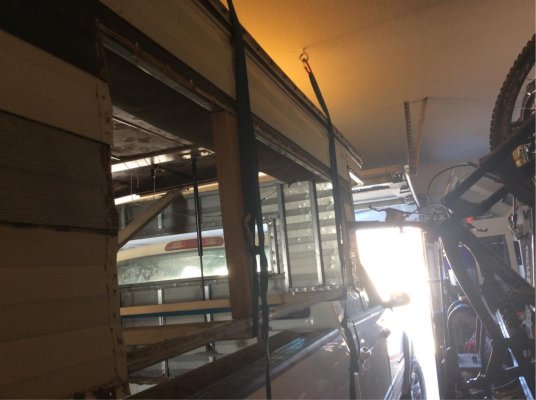
Rigging system. Climber Z drag beer drinking slack line, retrofitted to give me a 2 to 1 on my biners. Pretty important to make these pieces of wood to hold the shape of the FWC. These things are made out of aluminum foil once the floor is close to being off. I am sure I am responsible for a few of the cracked welds I found.
 

Attachments

  • E5592971-E6E6-4BC4-9820-70146944BE4A.jpeg
    E5592971-E6E6-4BC4-9820-70146944BE4A.jpeg
    87.4 KB · Views: 118
  • 06489128-BF24-4C6C-ABC7-6B82EE7D7E9E.jpeg
    06489128-BF24-4C6C-ABC7-6B82EE7D7E9E.jpeg
    98.4 KB · Views: 153
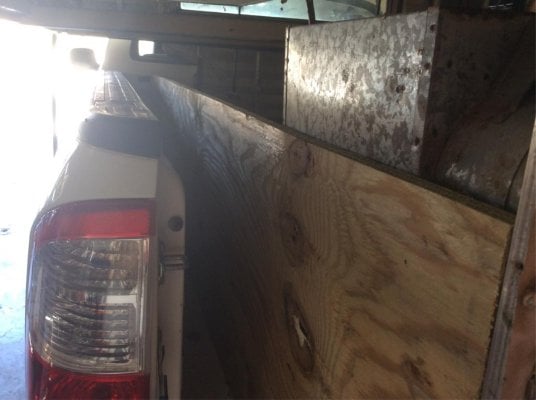
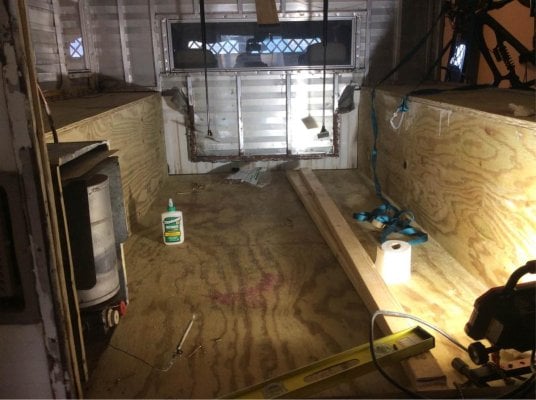
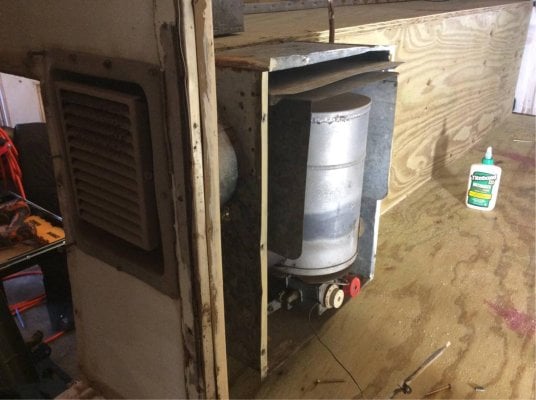
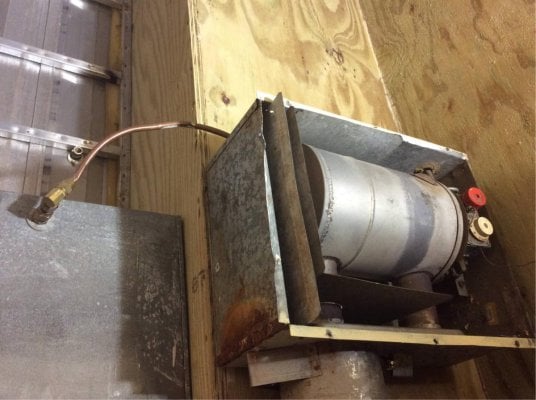
So in my previous floor pack, There was a box built out wider for the back, and the furnace was visible from underneath. Is my furnance supposed to be visible, does it have to vent from around the furnace to the outside? Or can I box it as is, into the interior?

If this is a dumb question, I apologize, I do not have much experience with camper heaters.
 
Porter,

I'll attempt at answering your questions, but others may have additional comments to make.

On my original Grandby, the furnace was completely enclosed. That heater was a hydro flame that vented through the back, lower portion of the camper adjacent to the door, but the heat was directed out of the side of the furnace, through a vent to the inside of the camper.

on my new set up, I have a new Atwood hydro flame heater that now vents the expelled gas to the outside of the camper on the side wall, and it is setting on the overhang portion of the floor pack. The heat generated comes straight out the front of the furnace with no side venting.

The heater manufacturer designates the wall clearance next to the heater body. On my new furnace that info was on the heater itself, and it said it needed 0" clearance on all for sides. So, that meant I could have it in an enclosed fixture. Except for setting directly on the plywood underneath, there was still 3" spacing on each side of the main body of the heater, and about 1" on the top.

The way these heaters work is there is a sail switch that is activated when the fan first comes on, and the heat exchanger does not fire up until the sail switch is activated for about 30 seconds, and then the heat exchanger lights up. When the heater shuts off, the heat exchanger flame turns off, but the fan continues to blow air out of the vent until the furnace is cooled sufficiently to not overheat the surrounding enclosure, at which point the fan turns off until the thermostat re-activates and starts the cycle over again.

Yours is probably similar, but I can't tell exactly from your picture. If it was originally fully enclosed, you should be okay. Hope that all makes sense.

Poky
 
Thanks for the Info Poky!

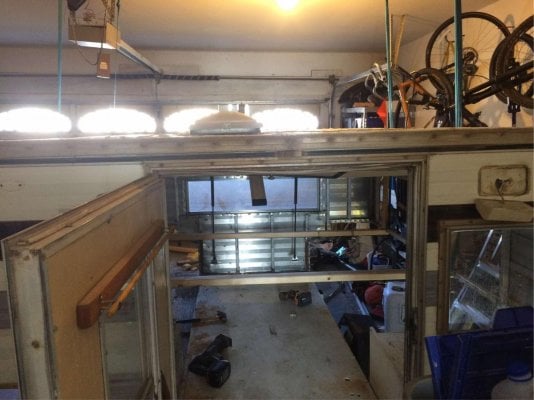
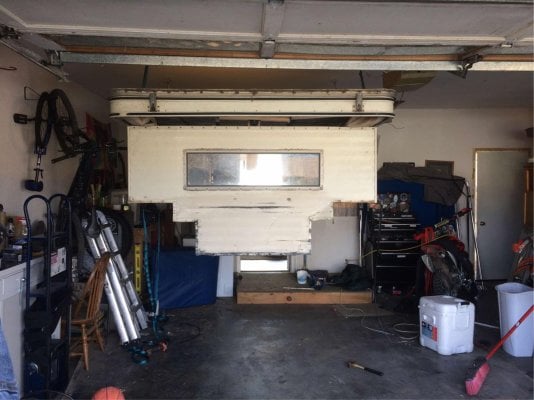
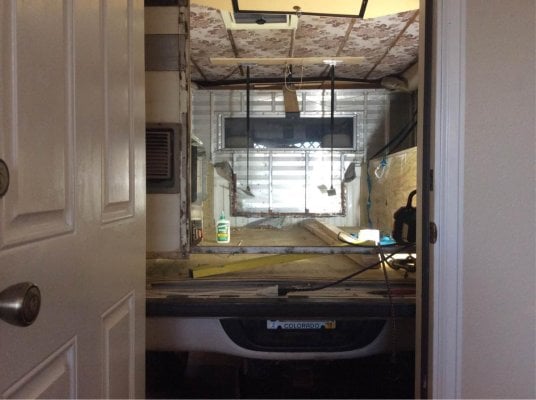
I made some progress today, and somehow I was still able to close the garage door for the night. Let me show you to your guest room.
 

Attachments

  • FE18F1E8-E739-4EA8-BA2E-6B56C167AFD5.jpeg
    FE18F1E8-E739-4EA8-BA2E-6B56C167AFD5.jpeg
    124.8 KB · Views: 132
  • FB36EE55-C338-4E85-8092-FC24013D33CE.jpeg
    FB36EE55-C338-4E85-8092-FC24013D33CE.jpeg
    107.7 KB · Views: 130
That is an entirely different furnace type that I haven't seen before. I'm betting that it is built with the same intention of placement. If it was touching plywood before, it likely is designed for a tight fit. Call FWC if you're not sure, as they will know more about that heater, even though it is quite old.
 
PokyBro said:
That is an entirely different furnace type that I haven't seen before. I'm betting that it is built with the same intention of placement. If it was touching plywood before, it likely is designed for a tight fit. Call FWC if you're not sure, as they will know more about that heater, even though it is quite old.
Hahahaha.

You trying to tell me to get a new furnance Poky????
 
PokyBro said:
That is an entirely different furnace type that I haven't seen before. I'm betting that it is built with the same intention of placement. If it was touching plywood before, it likely is designed for a tight fit. Call FWC if you're not sure, as they will know more about that heater, even though it is quite old.
Google is your friend. That is a Hydro Flame Furnace Series BRC-10----

Link ......... Link


attachment.php


But with that infomation I would look for a new heater.
 
Thanks Bill.

I have been searching like crazy. Thanks again for the help. I want a heater that I can feel comfortable leaving on during the night. Right now I don’t have an electrical system, but I am sure I will do a couple of deep cycle batteries eventually. I guess a heater from 1978 may not be a great option. The guy that I bought it from said that the furnace was either on or off, but I assumed replacing the thermostat would probably fix this. He also said that it had enough heat to run you out of the camper.
 
I had that same heater in my 79 Grandby. I pitched it, didn't even consider using a 38 y/o gas heater. If doing a rebuild, you might want to consider something newer. If the old one craps out after you build the camper around it, could be more expensive to change your build to fit a new heater. That was my reasoning.
 
IMG_0123.JPGIMG_1411.JPGIMG_1412.JPG

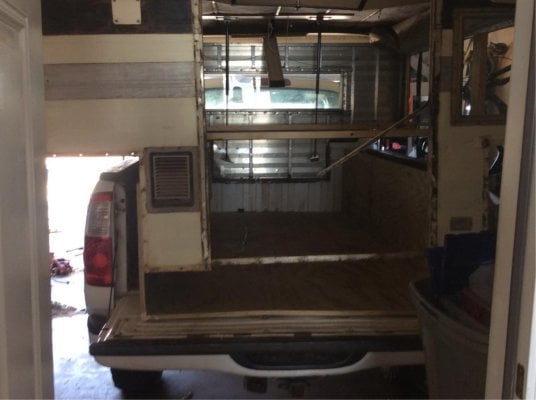
More progress. Floor Pack attached to the FWC. Wondering if I should go talk to my welder, or just shore it up with wood.

I think you guys have sold me on getting a newer heater, and I guess I am on the hunt for some windows now.
 
90% of truck campers are framed out of wood, so I guess you could just go with wood. I'd think about a piece of aluminum diamond plate to go across the front where you need to fill in the siding. A 1 piece plate would strengthen the front and tie everything together.
 
It is aluminum framed, why would you consider not getting the broken welds re-soldered, unless it is the cost. One has to ask the question, would doing it half ass be acceptible to me or fixing it the right way. If it was my decision, I would get the broken welds re-soldered. I would really think it through. Just my thoughts. jd
 
You can braze aluminum. Just google it. Home Depot sells aluminum brazing rods. You will need a MAP gas torch to do the brazing. I repaired a couple broken welds on my FWC frame, but it was a bare frame with no siding or other material near by that extreme heat would affect. You could still use aluminum tubing and pop rivet the joints with angle brackets. With diamond plate panels on the outside it would be more sturdy than original.
 
Image1511305995.180441.jpg

A little more progress.

I am definitely trying to keep this on the cheap side, I have time constraints and so does my welder. All of the broken welds are in the front of the camper. I am guessing someone backed into it at some point. I have been using angle hardware that I had laying around.

I love the idea of the diamond plating as well. A 4x5 sheet is like $79 or something. Might need to go harass my Toyota Mechanic and see if he has anything laying around his yard that might work.

I also think I lost a little rigidity when I eliminated the 90 degree turn in the original floor pack. This gives me a good excuse to make the front of the camper a little more bomb proof. Plus I have a idea about a kind of Murphy bed, table combo creeping around in my mind.

What drew me to the FWC was how capable it is off road, and its weight. I know I am sacrificing a little weight for my custom build, but I also do not intend on building it out to the same scale as a lot of other people.
 

New posts

Try RV LIFE Pro Free for 7 Days

  • New Ad-Free experience on this RV LIFE Community.
  • Plan the best RV Safe travel with RV LIFE Trip Wizard.
  • Navigate with our RV Safe GPS mobile app.
  • and much more...
Try RV LIFE Pro Today
Back
Top Bottom