1988 Four Wheel Camper Grandby renovation and Tundra Fit

Ourayphotography said:
Yes, I think they pick up the alum frame for the jack plates, and all the wood is weakly supported. Just screws through the side. Half my plan was to be able to camp when on jacks. Looks like a no go on a stock FWC
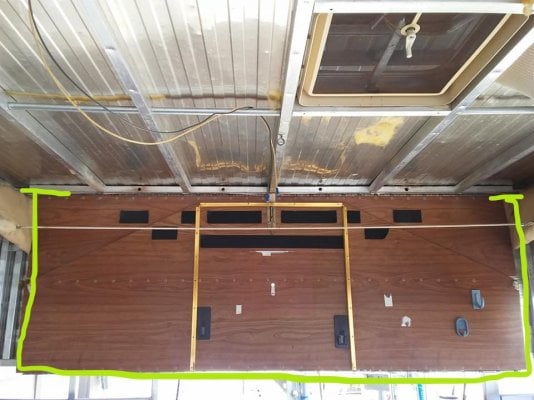
It can be done, but that means dragging a little more gear along. A set of 4 aluminum trailer screw jacks with 2x6s spanning them will work. Six would be better. Get on a good flat spot, then lower the camper down. I did this with an old hardside to minimize movement when off the truck.

https://www.amazon.com/Cynder-02047-Aluminum-Stacker-Stabilize/dp/B07LDL9BKC/ref=asc_df_B07LDL9BKC/?tag=hyprod-20&linkCode=df0&hvadid=241895364904&hvpos=1o2&hvnetw=g&hvrand=932948221717690440&hvpone=&hvptwo=&hvqmt=&hvdev=t&hvdvcmdl=&hvlocint=&hvlocphy=9032833&hvtargid=pla-657236794287&psc=1
 
Ourayphotography said:
Happy 4th!

Continue skin tear down.

Question.
If I rebuild the exterior skin next, how do I deal with the canvas? Can the canvas be dealt with later without re-tearing things apart? Or does the canvas need to be done first? It looks tucked under all the old trim which will need to be dealt with on the skin re-side.
Thoughts? THX
The canvas goes over the exterior skin on the lower body. You leave the canvas long, pull the canvas tight, then install the moulding.. Final step is to trim the canvas off at the bottom of the moulding. Originally the canvas goes over the aluminum roof material, and the upper moulding then goes on. I followed Poky's way though. Putting the canvas under the roofing material first, then the moulding. With the roofing material over the canvas it will shed water better if the moulding caulk fails. Just to clarify things, you start by putting the canvas on the roof first. Raise the roof, stretch the canvas over the lower body, install moulding then trim.
 
shellback said:
The canvas goes over the exterior skin on the lower body. You leave the canvas long, pull the canvas tight, then install the moulding.. Final step is to trim the canvas off at the bottom of the moulding. Originally the canvas goes over the aluminum roof material, and the upper moulding then goes on. I followed Poky's way though. Putting the canvas under the roofing material first, then the moulding. With the roofing material over the canvas it will shed water better if the moulding caulk fails. Just to clarify things, you start by putting the canvas on the roof first. Raise the roof, stretch the canvas over the lower body, install moulding then trim.
Thanks Shellback.
OK, so if I wanted to deal with the canvas down the road, I would redo all my lower skin and tug the old canvas under the upper trim. maybe do less holes to get by for now. When time to deal with the new canvas, pull the top strip again and redo? My plan was to re-skin, do some mild interior, and be able to use the camper with the old canvas for now. Make any sense? Thanks again
 
Not sure if it's possible, but I'd try to do one side at a time and try to slide the new siding up under the canvas. If you were to loosen the canvas on all sides and raise it up to do the siding, it may be very difficult to pull the canvas back down over the siding. There won't be much material to get a grip on. With new canvas, the material is longer to give you a good grip pulling it down.
 
shellback said:
Not sure if it's possible, but I'd try to do one side at a time and try to slide the new siding up under the canvas. If you were to loosen the canvas on all sides and raise it up to do the siding, it may be very difficult to pull the canvas back down over the siding. There won't be much material to get a grip on. With new canvas, the material is longer to give you a good grip pulling it down.
Oh OK gotcha, did not even think about that. no canvas left to grab. Hmm
 
Ourayphotography said:
Oh OK gotcha, did not even think about that. no canvas left to grab. Hmm
You should be able to lower the top a bit and be able to grab the canvas and hold it at the edge of the trim when you fasten it back. I'd think that if you lined up the screw holes it would go right back together.
 
a8ksh4 said:
You should be able to lower the top a bit and be able to grab the canvas and hold it at the edge of the trim when you fasten it back. I'd think that if you lined up the screw holes it would go right back together.
Good point, you could lower the roof some and block it up. My original "canvas" was very fragile, I would have been very reluctant to disturb it anymore than I had to though.
 
quickie.
Lift panels.
Any reason why it must be 2 piece and folding? Could they simply be one "U" bar or panel that could drop from the ceiling?
 

Attachments

  • 62509521_10206403155674614_1956238340676124672_n.jpg
    62509521_10206403155674614_1956238340676124672_n.jpg
    120.2 KB · Views: 79
^ I blew up the rear panel thru misadventure and replaced with a single panel, hinged from the top and secured at the bottom with slide/barrel bolts. Went beefier material than stock because, those days, we carried a good weight on the roof. Sits on a ledger (last pic) Note there's a spacer on the end of the panel, can't recall why but prob the ol' measured only once goof. Sorry, I haven't mastered attachment posting.

gallery_351_1339_1022120.jpg


gallery_351_1339_9078.jpg


gallery_351_1339_862228.jpg


ON EDIT I should mention this design isn't as conducive to single operator deployment as the oem style. And, if used for the front end, reaching over the cabover berth could be a challenge.
 
One thing about the oem design, the roof and body are always well attached. That helps with control when you're raising and lowering the top, esp when windy for eg. Also I think the wide breadth of the attachment points helps with stability as opposed to a hoop, tho I think there's a blogger following this who used a hoop type design with good success...

I recently refurbed the front panel assy, replacing the top half. It's tricky to match the dimensions but will be a lot less critical in your case where the soft wall is fitted after. One tip, if you do use piano hinges where they must close together, is to stagger the attachment holes so the two rows of fastener heads don't interfere with each other. If buying new hinges look for one that comes with the holes offset. Otherwise you may find yourself grinding those rivet heads down, just so the top can close that much more and lock (bogus).
 
klahanie said:
^ I blew up the rear panel thru misadventure and replaced with a single panel, hinged from the top and secured at the bottom with slide/barrel bolts. Went beefier material than stock because, those days, we carried a good weight on the roof. Sits on a ledger (last pic) Note there's a spacer on the end of the panel, can't recall why but prob the ol' measured only once goof. Sorry, I haven't mastered attachment posting.

gallery_351_1339_1022120.jpg


gallery_351_1339_9078.jpg


gallery_351_1339_862228.jpg
Well how cool is that! I wondered why it cannot be simple. The front would be a little more awkward to get to, but would it be doable?
 
^ Ya, it was just the one person issue and the reach. Plus the less control of the roof with the panel being not fully attached until up and locked in. Hasn't be a prob for us at the back. Can't say for sure about the front. I chose to re and re the front rather than replace with a single panel. The oem is a pretty good solution - I can't really knock it - but I'll say it's not easy to pull apart and repair so I don't be surprised some look for other solutions.

The other thing is the oem gives a bit of an assist with the sprung hinges. That might be moot with struts now, IDK. Whatever way, If there's two you everything should be easier (or that's what they told me ... :rolleyes:)
 
klahanie said:
^ Ya, it was just the one person issue and the reach. Plus the less control of the roof with the panel being not fully attached until up and locked in. Hasn't be a prob for us at the back. Can't say for sure about the front. I chose to re and re the front rather than replace with a single panel. The oem is a pretty good solution - I can't really knock it - but I'll say it's not easy to pull apart and repair so I don't be surprised some look for other solutions.

The other thing is the oem gives a bit of an assist with the sprung hinges. That might be moot with struts now, IDK. Whatever way, If there's two you everything should be easier (or that's what they told me ... :rolleyes:)
OK good point, when unattached, it is floating. A push rod of some sort would be something to look at. Thanks for the pictures.
 
I'll reference my old 88' again and also agree that a single pivot panel works just fine. I don't have any pictures but the front panel was just a single piece of of 3/4" plywood that used the original piano hinge on the bottom. The stock wire push handle was attached to the top with some 1" aluminum angle and the good ol' speaker stand was used to lift the roof. It worked great and I imagine it was much stronger than the 1/8" ply stock panel. Gravity kept it in place and I'm sure struts would also help.
 
^ yep, hinged at the bottom would make the roof a whole lot lighter - wish I'd thought of that, doh ! - and won't make a difference in the front (panel lays on bed).

might just work ...

Another thing with the oem is they are flexible (?) and that might provide a bit of "give" when lifting the second end. The roof might need to move fore or aft a bit when lifting the second end up. And the first up panel might need to pivot or compress a little during that transition from the roof being sloped to horizontal. I just can't remember how they react with the oem style at both ends. As a precaution we lift the back single panel first and only part way up (resting it on the counters). Then lift the front up fully. Then complete the rear lift. I think without doing that the soft side gets stressed. Just a FWIW.
 

New posts - WTW

Back
Top Bottom