1988 Four Wheel Camper Grandby renovation and Tundra Fit

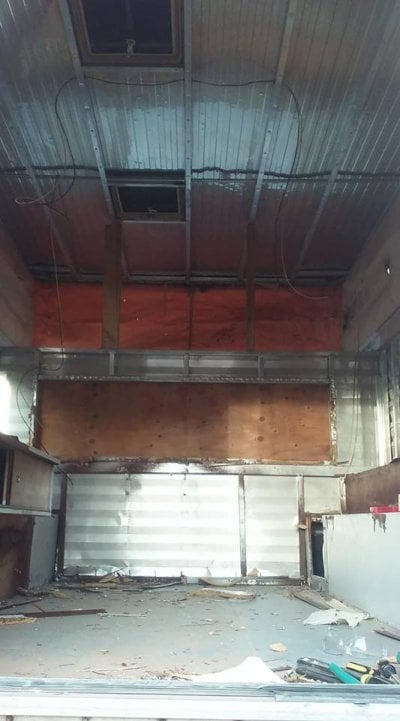
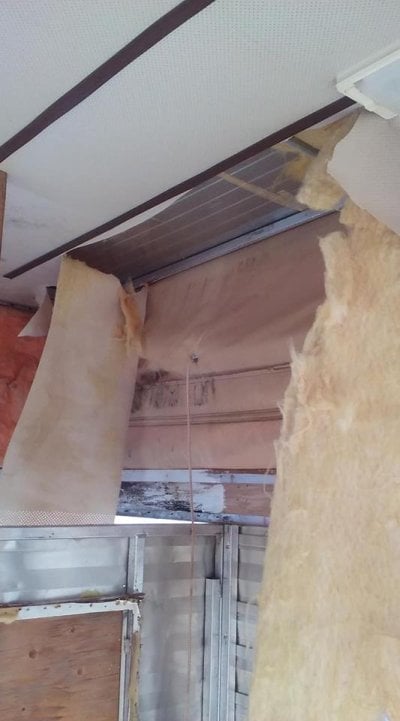
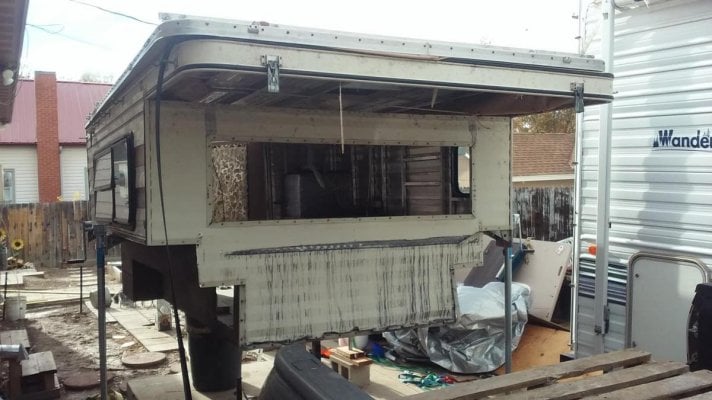
“Also not sure If I can rebuild the inner liner and ceiling with the canvas attached. Thoughts?”

Ourayphotography,

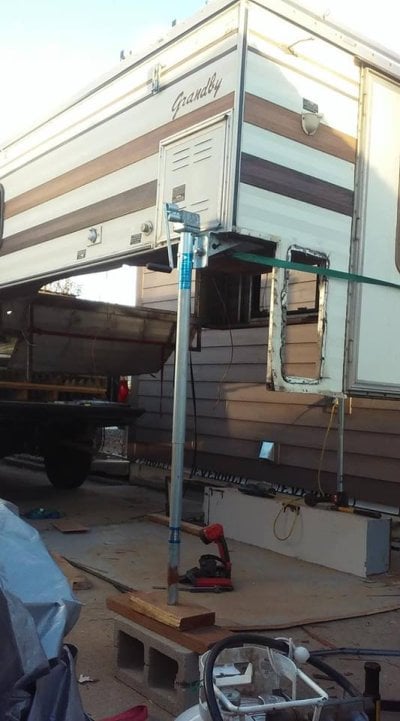
First, thanks for sharing your build project with us. Many people seem to love these build threads, I guess to see what your creative side comes up with. So, we’ll be following along in anticipation.

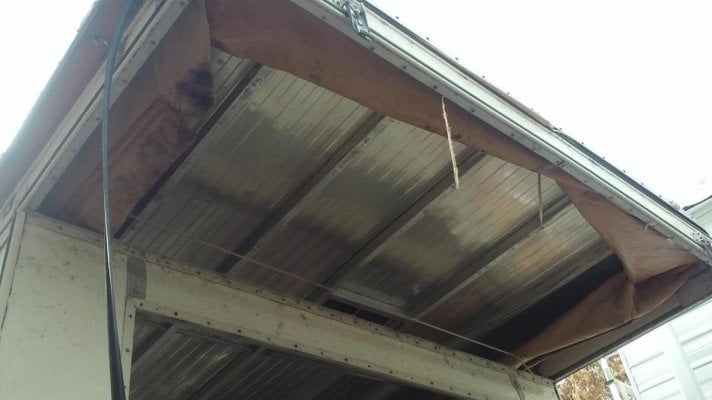
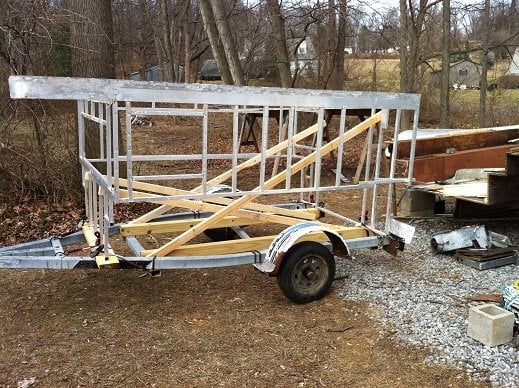
Regarding your question above, in my opinion, the right way to replace the headliner is with the roof off. Here is my reasoning, first you’re dealing with gravity when you try to put up headliner over your head, and need a way to fasten it. It would be very awkward, and the material you’re replacing is likely perforated vinyl, and it has some weight to it. Second, the headliner should get tucked up under the aluminum skin of the roof, and the sideliner is also best tucked up under the roof skin as well, overtop the headliner material, with the side of the roof material folding over both like a shingle effect. Then the trim ring goes on last. Since you’ve seen my build thread, if you go into it far enough you’ll see the section where I installed the headliner with the roof off, turned upside down.

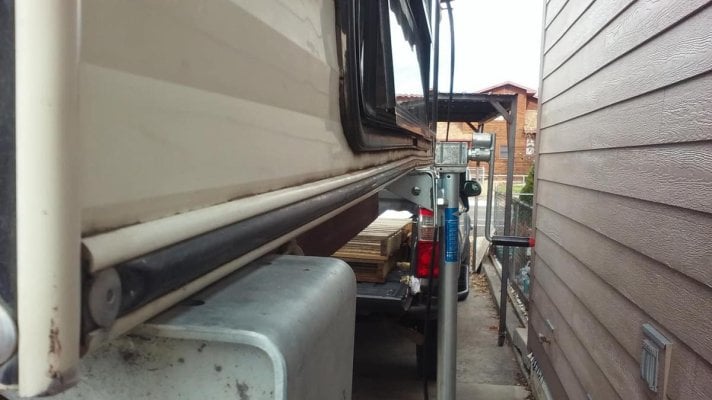
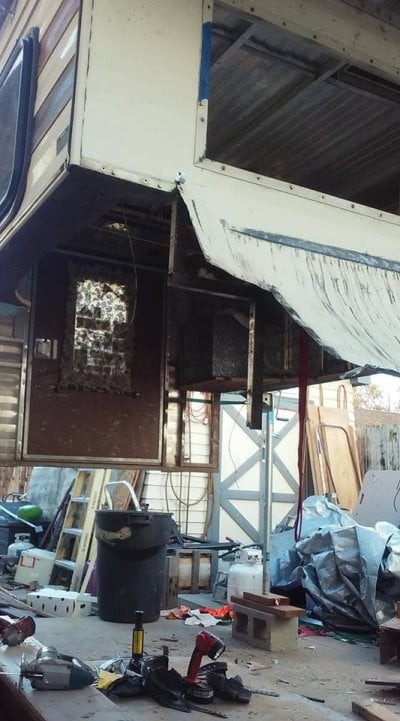
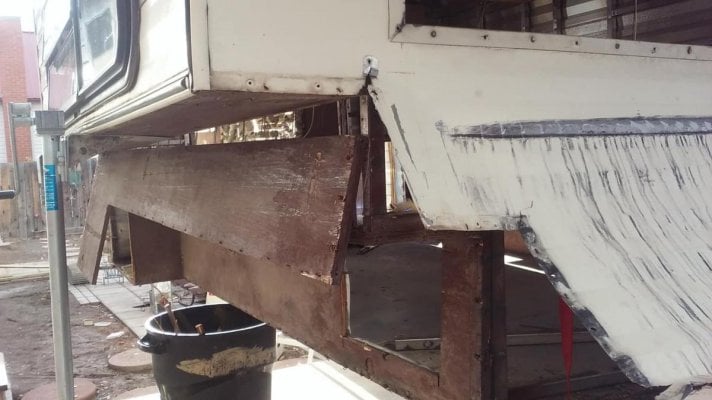
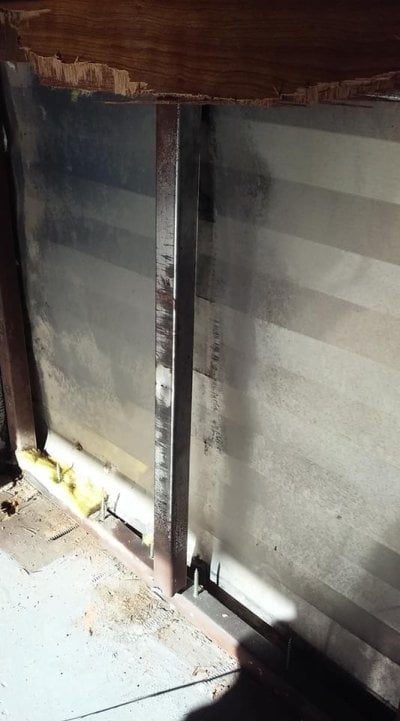
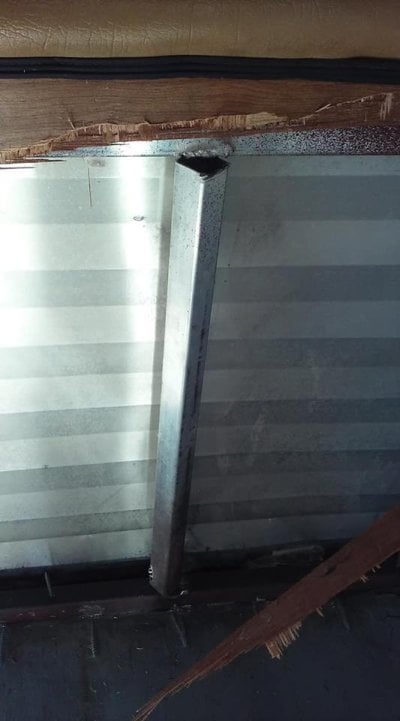
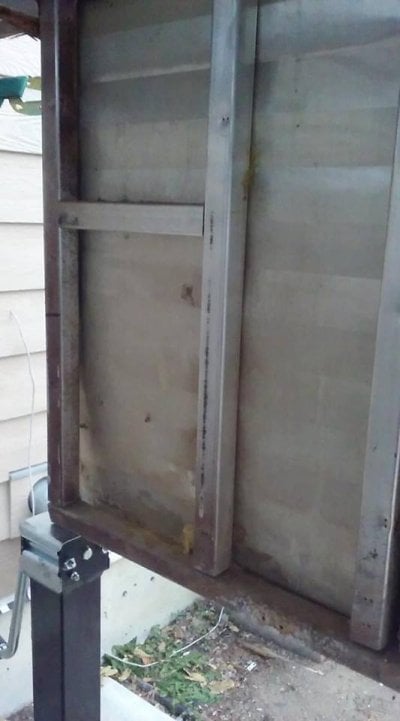
I don’t know what year it changed, but most of these older campers were assembled with the headliner tucked up under the roof skin (sheet aluminum), then the sideliner was sandwiched between the trim ring and the roof skin. The only barrier for water intrusion was effective use of sealant around the ring. If it dried and/ or peeled, it would fail to block water from entering and seeping inside down the side liner material. So a lot of these old campers suffered from wet lift panels that eventually came apart, and wet overhang bed board, that became damp , moldy, and came apart.

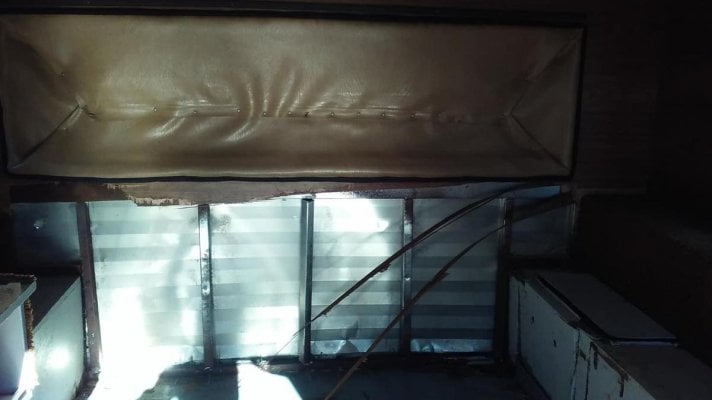
So if you intend to use the existing side liner (canvas), it might be tricky to install new headliner as is. You also have the added situation of the lift panels being in place assembled overtop of the current headliner material.

Hope this is helpful. As others have offered, just let us know when you have questions, you’re sure to get some helpful thoughts.

Poky
 
Vic Harder said:
yes!

Man, all that mold sucks. Where did all the moisture come from to feed that?
Yes, it is pretty bad. I am guessing there are some pretty bad roof leaks. One of the skylites is missing its cover too. I have not gotten up there to look much yet. Crazy thing, someone had painted over it white to hide it in the past. The family I bought it from said they had been camping in there last summer. Yuck
 
Thanks Poky, very good info. Going through some of the builds in the group, making a new side canvas is a very daunting thought for me. I would really liike to do my best to salvage the old one if possible. How about a light veneer wood skin as a replacement inner roof? Slice the old junk liner out and screw in veneer panels? Possible? THX
 
I'd choose a synthetic material versus wood. There's a lot of condensation in a popup camper when using propane heat. When I rebuilt my roof, I replaced all the screws with the next size up. Some screw holes had spider cracking around them. On those I made up some thin aluminum plates to cover the cracked areas and epoxied them in place. After all that was done, I used Dicor self leveling sealant and covered every screw, the vent joint, and the center seam down the roof. As Pokey said, the side fabric is on the outside of the roof skin, with the trim providing the seal. When Pokey did his build, he tucked the side fabric up under the roof skin, then installed the trim. I followed his method on my build. So with the roof upside down, we installed the headliner with it wrapped over the outside framing and under the roof skin. Once the roof was in place, the side fabric was also wrapped around the outside of the roof framing and up under the roof skin. After that, I stapled the roof skin back to the framing and installed the trim.
 
shellback said:
Thanks. Yes, the outer roof I have some good ideas since I did some serious repairs on my travel trailer not long ago. Leveling dicor on each screw is a good idea, I have a few tubes here at the house. On the interior ceiling, instead of wood veneer, maybe the thin PVC sheets like sold at the depot? I dont think it needs to be fabric since moisture will travel through fabric and get into the insulation. I will look closer today at the ceiling fabric and the corners. I am thinking I can leave the side canvas and all attachments alone and simply slice the ceiling fabric liner away. Make sense possibly? Thanks again
 
Ourayphotography said:
Thanks. Yes, the outer roof I have some good ideas since I did some serious repairs on my travel trailer not long ago. Leveling dicor on each screw is a good idea, I have a few tubes here at the house. On the interior ceiling, instead of wood veneer, maybe the thin PVC sheets like sold at the depot? I dont think it needs to be fabric since moisture will travel through fabric and get into the insulation. I will look closer today at the ceiling fabric and the corners. I am thinking I can leave the side canvas and all attachments alone and simply slice the ceiling fabric liner away. Make sense possibly? Thanks again
I assume you have the original lift panels. So you may have to piece some aluminum angle in the front and back to attach ceiling material, as the lift panel hinges will probably prevent you from attaching on the roof frame.
 
Here's a picture of my roof on saw horses just to give you an idea of the frame work. You can see the screw holes for the lift panel hinges on the front frame member. Also in the picture you will see some white aluminum angle I used to mount the ceiling lights. You could put a few of those front and back to fasten your ceiling panels.
 

Attachments

  • resized.jpg
    resized.jpg
    134 KB · Views: 208
Curious about your thoughts on center of gravity with a 8' Grandby on a flatbed that used to be a standard pickup truck with a 6' bed. You will have 2' more out back than it was designed for.

I like the idea of a shorter wheelbase, but then the deck/camper will be hanging way out back and may get caught on ditches and such with steep approach/departure angles.

Just thinking about my next truck/camper...
 
Vic Harder said:
Hey Vic, my truck is a 6.5 bed, so will be 1.5' extra hang over. It will affect the departure for sure, but I think manageable. I decided it was worth the sacrifice as I need to sleep 3 people. Before I bought this, I was originally gonna build a custom camping pod that was going to be 8' long on the top, but angle cut on the bottom for departure angle. I have already cut the lower rear of my truck off for departure, so just the 4' section of the camper will be low but still better than stock.
 
Ok, a pretty good day.
We are pretty much gutted. Answer to my own question, yes, it looks very doable to replace the ceiling with the top attached and will not affect the canvas sides. Will take some planning with the support risers/lifters front and rear, but doable. I will prolly design a new lift system. Pretty happy about that. I dont think I will use a fabric ceiling, but some sort of thin light rigid material.The ceiling might require some breathing, so I would need to add a few filtered ceiling vents.
I may have found someone locally to do aluminum tig welding for me, so my plan to eliminate all of the wood base and tub might be attainable. With all the construction exposed, some things impress me, some not so much. Having only a single weld on each square tube is very weak and will fail over time. I will add welds to as much as possible to beef things up.
Had a crazy coincidence that this set of stairs popped up on market place, $30!! Bam!
Thanks all
 

Attachments

  • 45105905_10205625878563172_2512278245768953856_o.jpg
    45105905_10205625878563172_2512278245768953856_o.jpg
    52.8 KB · Views: 234
  • 45256692_10205633909163932_3039120739845275648_n.jpg
    45256692_10205633909163932_3039120739845275648_n.jpg
    48.6 KB · Views: 255
  • 45426753_10205633907403888_6784673826476130304_o.jpg
    45426753_10205633907403888_6784673826476130304_o.jpg
    105.9 KB · Views: 234
I like it! The guy I bought my 88' grandby from had it sitting on a first ten tundra just like yours. He built a flatbed out of wood and beefed up the suspension and never looked back. He said he took it to baja several times and had no issues. Good luck with your build.
 
WyoIDI said:
I like it! The guy I bought my 88' grandby from had it sitting on a first ten tundra just like yours. He built a flatbed out of wood and beefed up the suspension and never looked back. He said he took it to baja several times and had no issues. Good luck with your build.
That is very cool. Any pics when you picked it up? Do you still have it?
 
Well she has landed. Wow, so much lighter. That was not a brilliant spot to mount the 3rd Jack. Next out, all of the wood tub structure
 

Attachments

  • 45359118_10205636620191706_3565055634317508608_o.jpg
    45359118_10205636620191706_3565055634317508608_o.jpg
    91 KB · Views: 249
  • 45390540_10205636621911749_2779964766846713856_o.jpg
    45390540_10205636621911749_2779964766846713856_o.jpg
    112.3 KB · Views: 257
  • 45256708_10205636625231832_970189939155140608_o.jpg
    45256708_10205636625231832_970189939155140608_o.jpg
    71 KB · Views: 255
  • 45348672_10205636623271783_9193189519254355968_o.jpg
    45348672_10205636623271783_9193189519254355968_o.jpg
    92.7 KB · Views: 228
No more floor.
A little sketchy, but the floor is out.
 

Attachments

  • 45274036_10205637036282108_8295255983878307840_o.jpg
    45274036_10205637036282108_8295255983878307840_o.jpg
    108.2 KB · Views: 200
  • 45238235_10205637034602066_7951803761502978048_n.jpg
    45238235_10205637034602066_7951803761502978048_n.jpg
    77.1 KB · Views: 230
  • 45306214_10205637036722119_7643403321281085440_o.jpg
    45306214_10205637036722119_7643403321281085440_o.jpg
    94.7 KB · Views: 233
  • 45340125_10205637035402086_7306704651510874112_n.jpg
    45340125_10205637035402086_7306704651510874112_n.jpg
    61.9 KB · Views: 228
  • 45295449_10205637034202056_3864366931603619840_o.jpg
    45295449_10205637034202056_3864366931603619840_o.jpg
    85.2 KB · Views: 196
I was wondering what the jacks were supporting till I saw the last picture. I see you left some of the wing plywood.
 
shellback said:
I was wondering what the jacks were supporting till I saw the last picture. I see you left some of the wing plywood.
yes exactly. most of the alum in the area is broken too, so not ideal, but everything is light now, so should be OK til I can get it down to some frame work
 
Broken welds.
Well, the frame is in pretty bad shape. Many broken welds and quite a bit of missing sections. Pieces literally fall out to the touch. I am at the point of whether or not to upgrade to a new mig machine that can handle aluminum and teach myself. This tubing is very thin wall, so not even sure a good weld can be accomplished with all the age and contamination. A light steel frame is not out of the question yet, but it as well would require some repair to the existing aluminum frame before marrying the 2. Hmm
 

Attachments

  • 45203942_10205625953085035_7503751282830606336_n.jpg
    45203942_10205625953085035_7503751282830606336_n.jpg
    62 KB · Views: 153
  • 45105865_10205625951564997_4336913656009719808_o.jpg
    45105865_10205625951564997_4336913656009719808_o.jpg
    61.1 KB · Views: 170
  • 45128314_10205625953525046_4741510072192991232_n.jpg
    45128314_10205625953525046_4741510072192991232_n.jpg
    44.6 KB · Views: 182
  • 45463029_10205640247282381_1200645420263407616_n.jpg
    45463029_10205640247282381_1200645420263407616_n.jpg
    41.2 KB · Views: 175
  • 45078610_10205625955485095_8749283376239738880_o.jpg
    45078610_10205625955485095_8749283376239738880_o.jpg
    61.9 KB · Views: 151
Ouray,

Sorry to see the broken welds. Mine was pretty bad as well. I was able to find a local guy that was a master at tig welding. I beefed up the frame with additional aluminum square tubing, cut the pieces and positioned them where I wanted them, held in place with L-brackets, and took it to the welding shop. He charged me $50/ hr, which I thought was reasonable. MiG welding requires special equipment and I think with how thin this material is, might be difficult to not burn through. Acetone will remove the paint nicely, and clean the aluminum up really well. It has to be clean to weld.

Poky
 
I did the same as Pokey. Precut all the pieces and took the frame to a shop and had them do the welding. Here's my frame on a trailer ready to go to the shop.
 

Attachments

  • resize.jpg
    resize.jpg
    145.5 KB · Views: 171

New posts - WTW

Back
Top Bottom