Full build - Reconstructing a 1981 Grandby into a custom Hawk!

wuck said:
Pokey-
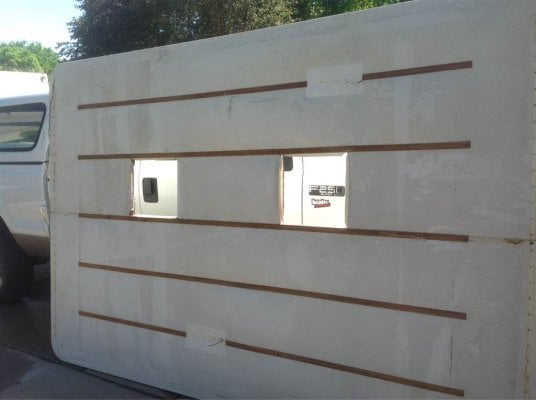
I tried to get a couple of measurements for you, but access to that upper panel is difficult with an assembled camper!

I measured the bottom (triangular) piece to start - I got a bit of variance and noticed the rivets don't all line up, they wander up and down a bit. So an "eyeball average" (you measured 11-7/8") seems to be about 12", +/- 1/8" or so.

For the upper panel, I measured from the upper rivets on the panel to the rivets attached to the lower panel (middle hinge), getting about 12-1/2". From that number, we can subtract out the center to center distance of the hinge, 7/8", arriving at 11-5/8" center to center for the upper panel itself (you measured 11-1/2"), close enough?

Hope this makes some sense to you, but they do appear to be slightly different to answer your question.
Hey wuck,
Thanks for taking the time to measure the panels on your camper, realizing you had to go open it up, I really appreciate it bud! You're right about trying to explain how you take measurements, it's like what do you call this and that. Makes me chuckle at myself.

So, it appears the distance between rivets on the bottom, triangular panel are slightly greater by 1/2" - 5/8", than that of the top panel, based on yours and my panel measurements.

When you think of how long ago my factory panel was made, compared to present, it's an obvious situation of "if it ain't broken, don't fix it". I'm just guessing, but the slightly greater difference on the bottom panel, may have something to do with how pressure on the bottom panel opens the lift panels with ease, as they do, slightly over dead center like a fulcrum. Not sure.

If anyone else would care to measure their panels as described above, it might help confirm these measurements with even more surety. I haven't gotten an answer back from an email I sent to the factory yet.


Sent from my iPad using Wander The West
 
rudhawk said:
I see some of your posts are before 6:00 AM & others are around midnight - so when are you sleeping?
Rudhawk, the time stamps appear inaccurate by my estimation. Whenever I have posted, my local time is completely different. Although I have done some posts very late in the evening.


Note: When I did the timeline post above, I meant to make a comment or two, but forgot. Some of the long spaces between build activity, had to do with the camper frame being out in the yard during winter months here in Colorado, with cold temperatures and snow. Once I did the floor pack, it had to come inside the garage, which pretty much pushed my wife's car out to the front driveway, so that required a little finessing, if you know what I mean.

Because my build has taken quite a space of time, it led to the forum name I gave myself, PokyBro, it seemed fitting.

Wouldn't that be an interesting thread, to know how everyone decided on their own forum names? Maybe I'll do that sometime soon for fun.


Sent from my iPad using Wander The West
 
Hello friends, it's been a while since I've posted, but I have been making some progress on my build. I had to take some time off for some important family matters, and I've been delayed on some planned projects on multiple weekends, such as painting, because of rain on the weekends. I don't like spray painting inside the garage on larger items, because overspray gets on things you didn't intend it to.

I've been enjoying reading and following what others have been doing, and I am so impressed with some of the current projects others are tackling presently, themselves.

So let's catch up with a some more photo journaling.

First up, I had some corner jacks that came with the original Grandby, that I welded on some plates, because I wasn't able to use the bands that were on them originally. The corner mount brackets were not suitable for how I wanted them to look, and as shown earlier, I made, and installed new ones. I drilled the three holes that mate the jack plates to the corner brackets at the time they were first made. So, all I had to do then was weld them to the jacks.

ImageUploadedByWander The West1465101488.694869.jpgImageUploadedByWander The West1465101508.490843.jpgImageUploadedByWander The West1465101526.394298.jpgImageUploadedByWander The West1465101544.460863.jpg


Sent from my iPad using Wander The West
 
I've also been working on the lift panels. I showed photos earlier of cutting the panel pieces out, and had indicated I was fiberglassing them for increased strength, and to protect the wood from moisture. I used plywood, that was probably close to 3/16" thick (I should measure that), and thought they would work out great. The thin panels that came with the original camper, and the panel the previous owner had redone seemed pretty flimsy to me.

Little did I know, I was headed for a set back!

I thought about not sharing this, because I should have made sure the extra thickness would work, but for the benefit of others, I'll show what happened.

ImageUploadedByWander The West1465102099.709849.jpgImageUploadedByWander The West1465102121.756945.jpgImageUploadedByWander The West1465102139.690202.jpgImageUploadedByWander The West1465102157.796429.jpg

Everything was looking good so far, and I was quite pleased with the nice smooth finish I had achieved on the panels. Then the set back became clear.

When the plywood is too thick, the hinges won't articulate fully, which is needed for the panels to fold completely. I found this out when I tried to bend the first panel. Luckily I hadn't installed them on the roof, and the camper wall, before I found this out, and I had only assembled one panel so far. Not much I can say, except oops, I should have seen this at the beginning.

I didn't cuss, but I did want to cry! l sure didn't feel like working on anything more that day.

So, my mistake will hopefully prevent someone else from doing the same. Here's what the panel looked like.

ImageUploadedByWander The West1465103073.805862.jpgImageUploadedByWander The West1465103131.873086.jpg

Have you ever heard of a dang-it doll? I needed one at that time. Years ago at a family reunion, they were rattling off dang-it dolls. What is a dang-it doll? It's basically any cheap little doll that you picked up and throw across the room, while exclaiming .....DANG IT! It's a better choice than a hammer.

I was able to salvage the hinges, but it was a pain to remove the rivets carefully enough to prevent too much damage.

Anyhow, it will all work out in the end. I plan to take a lot of photos of the next panels I build, as I would love to provide more detail than what I've seen on other posts.


Sent from my iPad using Wander The West
 
Today I worked hard on getting the rooftop ready.

There was a lot of crud built up on the outside surface from years of non-use, and not being kept up, that needed to be cleaned off. There was also a lot of silicone sealant around the edge that would need to be removed before repainting. I used a pressure washer first, then a scrub brush, cleanser, and elbow grease, then pressure wash again.

ImageUploadedByWander The West1465105317.847024.jpgImageUploadedByWander The West1465105339.518372.jpgImageUploadedByWander The West1465105380.088705.jpgImageUploadedByWander The West1465105405.562678.jpgImageUploadedByWander The West1465105426.683355.jpgImageUploadedByWander The West1465105444.149782.jpgImageUploadedByWander The West1465105481.010803.jpg


Sent from my iPad using Wander The West
 

Attachments

  • ImageUploadedByWander The West1465105792.403301.jpg
    ImageUploadedByWander The West1465105792.403301.jpg
    48.9 KB · Views: 458
On the inside, the old headliner was cracked in a few spots, and was mildewed from water leakage (not something I want to be breathing), and the wood trim on the inside roof struts was also peeling and shot. I have new marine grade, treated, mildew resistant, perforated vinyl headliner to put back in later. So out came the old headliner, along with the insulation matts, as I plan to use solid foam insulation, as I did on the walls.

ImageUploadedByWander The West1465105946.392905.jpgImageUploadedByWander The West1465105965.062544.jpgImageUploadedByWander The West1465105982.993741.jpg

Once the insulation batting was removed, I laid the top upside down to see how much arch was still left in the roof struts, which seemed flattened outwardly. Sure enough they were somewhat flattened, probably from too much snow not being removed timely while it was not in use. I came up with an idea to put a 2x4 at each end, and put a slight arch back in the struts by carefully walking on them. It worked pretty well, so I did it length wise, and cross wise.

ImageUploadedByWander The West1465106392.104695.jpgImageUploadedByWander The West1465106436.221233.jpgImageUploadedByWander The West1465106460.100642.jpg

Lastly, I cleaned off the top surface with mineral spirits, applied one coat of primer, and once dry, one coat of gloss white finish. I will add a second coat later. I use a spray gun for this kind of project out in the back yard.

There is considerable hail damage to the roof skin, but I don't want to spend the money at this time to replace the aluminum sheeting. So it has a nice "pebble" texture to it, and I might not get too uptight if I get caught in a hail storm sometime. Just kidding, I'd still probably freak out.

Most of the time you don't actually look at the roof, especially when in the truck, so that's that for now.

That was a good days work, got a lot done, happy about the progress, and once I cleaned up the shop, I called it day!

ImageUploadedByWander The West1465106827.573115.jpgImageUploadedByWander The West1465106845.838818.jpg


Sent from my iPad using Wander The West
 
Thanks for the warning on the panels. I'd never have guessed it would be that easy to get a bow back into the roof.
 
Excellent work!

I gotta say, if not for the siding color and style I'd swear this was my project.

Last spring I bought an old grandby off some random guy who needed gas money to get home after the oil boom crashed up here, Less chopping the front back,I did almost the same thing of gutting it down to nothing!. The project was about 90% complete the middle of last summer but I came across a 10 year old Hallmark UTE in excellent shape that was for sale for pennies on the dollar and I couldnt pass it up, so we spent all summer, fall (and winter) using it while my project FWC sat idle.

I've started chipping away at it again with just the lift panels and new canvas to install and it'll be finished and up for sale as the hallmark will just better suit our family of 4.
 
Looking good PB. My first crack at EMT lift panels did not work either so don't sweat it! Thanks for sharing your misstep. If everything worked right the first time we would never learn anything.

Question for you if you don't mind. I am working on my interior side panels and trying to plan my canvas sew job for the next step. With the canvas in place and roof still on it is a bit difficult for me to get measurments. Do you know if at the front of the roof, is that curve a 5in radius curve? I know our campers are different models but I am guessing they have a similar radius on that bend. If my measurments are right its 5 but I figured since you had your roof in hand early maybe you could confirm?

Another question about the roof, did you measure the roof dimension compared to the camper body? On my first quick tape measure pull it started to seem like the roof was maybe an extra 1" in each direction? Maybe so it sits overtop of the camper, not just flush? But I could be wrong too. Anyways if you are getting ready for a sew job too figured you might have some info to share. Keep up the good work, still hoping to connect when I make it up to FoCo in the future.
 
craig333 said:
Thanks for the warning on the panels. I'd never have guessed it would be that easy to get a bow back into the roof.
Craig, thanks for your comments! Regarding re-gaining the slight arch in the roof, it is a delicate matter of walking from the middle to each end, on each rib, and watching and feeling it give till you can see it bend to the degree you want, and not walking too far toward the 2x4 underneath, so that you don't overdue it. It was especially more delicate going side to side, as the conduit tube cross member bends very easily, as compared to the 1" square aluminum tubes. Of course this was only possible with the roof off, the headliner and insulation out, and flipping it over to the frame underneath.


Sent from my iPad using Wander The West
 
ndflatlander said:
Excellent work!

I gotta say, if not for the siding color and style I'd swear this was my project.

Last spring I bought an old grandby off some random guy who needed gas money to get home after the oil boom crashed up here, Less chopping the front back,I did almost the same thing of gutting it down to nothing!. The project was about 90% complete the middle of last summer but I came across a 10 year old Hallmark UTE in excellent shape that was for sale for pennies on the dollar and I couldnt pass it up, so we spent all summer, fall (and winter) using it while my project FWC sat idle.

I've started chipping away at it again with just the lift panels and new canvas to install and it'll be finished and up for sale as the hallmark will just better suit our family of 4.
Ndflatlander, I appreciated your comments as well. You should share some photos of yours with us too. Funny that you purchased a Hallmark Ute and having been using and enjoying that. Around the time I got started on my FWC, I came across what I thought was a great deal on a Hallmark Ute as well, that I was going to use that summer, while I worked on FWC. When I got it home and was cleaning it up a bit and looking it over, I discovered there was substantial wood rot in the roof lamination at both front and back. I took several weekends to disassemble the roof on that camper, replacing the rotted wood and basically splicing in in new in such a way as to retain the strength for the roof to hold up. Anyhow, I'm glad you're enjoying yours, and I understand the preference, they are nice, comfortable campers.


Sent from my iPad using Wander The West
 
Living The Dream said:
Looking good PB. My first crack at EMT lift panels did not work either so don't sweat it! Thanks for sharing your misstep. If everything worked right the first time we would never learn anything.

Question for you if you don't mind. I am working on my interior side panels and trying to plan my canvas sew job for the next step. With the canvas in place and roof still on it is a bit difficult for me to get measurments. Do you know if at the front of the roof, is that curve a 5in radius curve? I know our campers are different models but I am guessing they have a similar radius on that bend. If my measurments are right its 5 but I figured since you had your roof in hand early maybe you could confirm?

Another question about the roof, did you measure the roof dimension compared to the camper body? On my first quick tape measure pull it started to seem like the roof was maybe an extra 1" in each direction? Maybe so it sits overtop of the camper, not just flush? But I could be wrong too. Anyways if you are getting ready for a sew job too figured you might have some info to share. Keep up the good work, still hoping to connect when I make it up to FoCo in the future.
Tim, I don't know how to calculate the radius measurement. My plan was to run a soft tape measure around the full circumference, and work off of that. At least it is one way to approach it.
I laid the bare roof on top of the camper body, and it looks like about a 1/4" overlap, or so, all the way around.
I purchased an industrial sewing machine (with the intention of selling it when I'm all through), and have been doing a lot of practicing sewing on Naugahyde scrap material to learn how to run the machine consistently, and to minimize the chance for mistakes when I tackle that part of the project soon. I'll PM you, and perhaps we can colborate on both of these side liners, if that's of any interest to you. Glad yours is moving right along as well.


Sent from my iPad using Wander The West
 
I Had another productive weekend, and made quite a bit more progress on the build. I remember reading that when ATC started on their first camper build, it took 1800 hours (hope I'm not misquoting), and man I sure feel like that's a strong possible situation here, but I couldn't truthfully say how many hours I've spent on my build. I didn't keep a time clock. There is definitely a drive, and a passion, to see this project through, and I will!

So let's see, what I can I show this week?

First, I have made the new lift panels, but I'm holding back to share the sequence photos until I fully assemble them, because I want to have them all together, hoping to possibly be of help to someone in the future for reference. But here's a sneak peak at the finished panels as they are, before assembly.

ImageUploadedByWander The West1465777186.904841.jpgImageUploadedByWander The West1465777206.705278.jpg

I also did some paint re-coating I was still needing to do on the trim pieces, which were shown in an earlier post, (been waiting for clear days without rain, because of drying time).

I spent most of my time over the weekend focusing on the roof.

In considering the way the ribs, and cross support EMT was originally done, it just seemed flimsy to me, and when I consider the possibility of snow weight, I thought I would add some additional cross member pieces, with the belief that tying the ribs together better, would provide a stronger overall structure, because adjacent ribs would help carry the load. I'm not trying to re-engineer everything, but as I go along, I figured it doesn't hurt to try things. Before, it was just the sheeting that kept the ribs separated. So, off to the metal store I went again, to get a length of 1 inch square tubing, and to HD for L-brackets. I know this adds a few pounds to the roof, but I felt it was worth it in the end. As it turns out, it does feel substantially more capable of carrying any weight better. My camper roof is rather short at 10 feet, with only a 3 foot cab overhang, but I'm kind of planning on adding lift assistance struts anyhow. Here's the before and after shots of the roof cross members. The ones I added were each cut individually, and then installed with the L-brackets, and #8 x 3/4" hex screws.

ImageUploadedByWander The West1465778145.619183.jpgImageUploadedByWander The West1465778184.863542.jpgImageUploadedByWander The West1465778208.626047.jpgImageUploadedByWander The West1465778233.872088.jpg


Sent from my iPad using Wander The West
 
PokyBro said:
I remember reading that when ATC started on their first camper build, it took 1800 hours (hope I'm not misquoting), and man I sure feel like that's a strong possible situation here,
A true labor of love.
That many hours at minimum wage would buy a guy a brand new unit.

Keep up the good work. You can't buy the personal satisfaction that comes from seeing a project to completion.
 
I'm planning on adding solar panels, so that was next on the agenda, as the wires would need to be installed in the roof before the insulation and headliner. I'm also planning to to have a solar panel jack on the exterior side, for a portable panel, if needed.

Here's some shots of what I'm using to port the rooftop wires to the inside. I came across this plate at Camping World, and I like how it keeps the wires horizontal on the surface the roof. I later found this 10 gauge plug connection kit made by Minn Kota at a Walmart, and it seemed like a good match. The wall plug is also 10 gauge, but for some reason looks thinner.

There was a small crack in the aluminum sheeting next to a screw hole, that utilizing the plate took care of. To attach the plate I put three screws into the rib tubing underneath, and a block of wood for the remaining screws. I also applied butyl tape to seal things off, and will later seal with silicone as a secondary measure later.

ImageUploadedByWander The West1465781321.847362.jpgImageUploadedByWander The West1465781344.954200.jpgImageUploadedByWander The West1465781367.998511.jpgImageUploadedByWander The West1465781397.386288.jpgImageUploadedByWander The West1465781422.186385.jpgImageUploadedByWander The West1465781438.189163.jpgImageUploadedByWander The West1465781468.012799.jpg

I hope I'm not sounding to boring, maybe it's better not to post after a long day in the heat, cause I'm tired out! Whew!
It's all fresh on my mind now though.


Sent from my iPad using Wander The West
 
Awhile back I was looking around on eBay, and came across some 6 foot Yakima tracks for a very good price, and couldn't pass them up, and they've been laying around until today. There is another recent post on installing Yakima tracks that provides the information needed for install. But to recap, I did the following for the installation:

First I removed the existing roof screws, and filled the holes with silicone.

I applied two strips of butyl tape to cover the width on the bottom of each track, measured off the distance from the back of the roof at 8 inches, to get each track the same, and marked where the screw holes would need to be centered on the ribs, based on the existing screw holes.

I was surprised to see how short the existing #8 screws were, that were used originally, but they did the job for the most part. A couple had lessened over time. I guess every "little thing" keeps the weight down! Right?

Once the track was placed over the previous holes, I fastened them with #8 x 3/4" black oxide pan head Philips screws. I put a dab of silicone in each track screw hole before seating the screw. Here's a picture of the screws I've mentioned. It wasn't too difficult of a job, but even though my roof is textured from hail, it still doesn't have leaks, so I tried be careful so no extra holes were made by mistake. I will seal the perimeter of the tracks with silicone later after the butyl tape settles and isn't continuing to squeeze out from underneath.

I also replaced all the existing #8 screws with these metal roofing screws that had neoprene washers. They were a little larger thread than I would have liked, but some of the existing holes were a bit loose. I put a dab of silicone in each of these holes, prior to fastening the new screws.

Sorry I didn't take pictures of each of the above, I got busy with the work and forgot to do so.

ImageUploadedByWander The West1465783803.844574.jpgImageUploadedByWander The West1465783833.355935.jpg


Sent from my iPad using Wander The West
 
Lastly, I did the wiring for the intended fixtures that will be installed. There will be three LED lights overhead, one over the galley, another over the side dinette, and one over the top bunk, and two fantastic fans (I hate to be hot).

I also connected 10 gauge wire to the solar panel plug. I drilled as few a number of holes through the frame tubing as I could, and used corrugated plastic wire casing in each hole for good measure.

I'm planning to have all four wires come down in one bundle, on the galley side of the camper.

ImageUploadedByWander The West1465784496.328874.jpgImageUploadedByWander The West1465784518.267058.jpgImageUploadedByWander The West1465784534.211493.jpgImageUploadedByWander The West1465784552.861181.jpg

Okay, so that's it for today. If anyone sees a problem with the wiring, please don't be afraid to let me know. This is basic stuff for most people, I'm sure, but you may see something I don't.

Thanks for checking in guys, I appreciate the interest. Cheers!


Sent from my iPad using Wander The West
 
PokyBro said:
Lastly, I did the wiring for the intended fixtures that will be installed. There will be three LED lights overhead, one over the galley, another over the side dinette, and one over the top bunk, and two fantastic fans (I hate to be hot).
I also connected 10 gauge wire to the solar panel plug. I drilled as few a number of holes through the frame tubing as I could, and used corrugated plastic wire casing in each hole for good measure.
I'm planning to have all four wires come down in one bundle, on the galley side of the camper.
attachicon.gif
ImageUploadedByWander The West1465784496.328874.jpg
attachicon.gif
ImageUploadedByWander The West1465784518.267058.jpg
attachicon.gif
ImageUploadedByWander The West1465784534.211493.jpg
attachicon.gif
ImageUploadedByWander The West1465784552.861181.jpg
Okay, so that's it for today. If anyone sees a problem with the wiring, please don't be afraid to let me know. This is basic stuff for most people, I'm sure, but you may see something I don't.
Thanks for checking in guys, I appreciate the interest. Cheers!
Sent from my iPad using Wander The West
Nice build pokyBro. I am slowly trying to bring a 1983 Keystone back to life. I narrowed the floor pack, made a slide out for the bed, rebuilt the front lift panel, added a fantastic fan (best thing I did), and a few other necessities so it was useable, and now I would much rather use it than work on it. But there is a lot more I want to do to it and eventually It will all get done.

You mention using corrugated wire casing to protect the wires, I wanted to share that, when I built Fire Trucks with aluminum frames, we used what is called plastic snap bushings that went into the holes in the tubing and the wires ran through the bushings to protect the wires. It made a good clean set up. The bushings come in various sizes from 3/16th id up to bigger than that tubing. They usually snapped in place and would stay there but we would usually dab a line of silicone around the edge and it definitely held in place. You might be able to find them at Home Deot, Menards or an electrical supply store. FWIW.
 
WyomingJames, nice to hear from you, and I can truly relate to the "just rather use your camper, than work on it", my mouth is watering for that!

Regarding the snap in bushings you mentioned, I did use those when I did the marker light wiring, and I think they are great. I will give that more thought. Thanks for the suggestion. You know how it goes when, " I had this stuff laying around, so thought I'd use it ".... The original wiring had nothing at all in the holes the wires went through, which surprised me, but it was made decades ago. Anyhow, thanks again for the recommendation. PB


Sent from my iPad using Wander The West
 
Back
Top Bottom