Yeah... I just now put a link to this thread in the first post of the roof lifting helper shocks thingys thread.ETAV8R said:IMHO I think most of this discussion could/should be in the roof lifter thingy's thread.
You are using an out of date browser. It may not display this or other websites correctly.
You should upgrade or use an alternative browser.
You should upgrade or use an alternative browser.
Roof lift gas struts
- Thread starter buckland
- Start date
Thanks Mark!MarkBC said:Yeah... I just now put a link to this thread in the first post of the roof lifting helper shocks thingys thread.
And if anyone knows of other roof-lift-strut threads that aren't listed in that catch-all thread, send me a PM.
(I know there are others...just haven't attended to that housekeeping yet)
(I know there are others...just haven't attended to that housekeeping yet)
This has opened a can of worms it seems like. But in a good way.
One question, do the FWC campers now come with per installed strut mounts?
Frank
One question, do the FWC campers now come with per installed strut mounts?
Frank
Rob, sounds like you should have room to use the 36" #40 struts.buckland said:I appreciate the input and advice from all....it is indeed a topic which effects many would be DYI (which is most FWC folk) installers of struts.
It makes sense to me as well, that owners of older model FWC who don't have pre-installed mounts or rivnuts should be able to adjust where they mount the hardware so that the strut will fully extend. On the other hand I do not want to be dissatisfied with the lift assist after installing the shorter strut either.
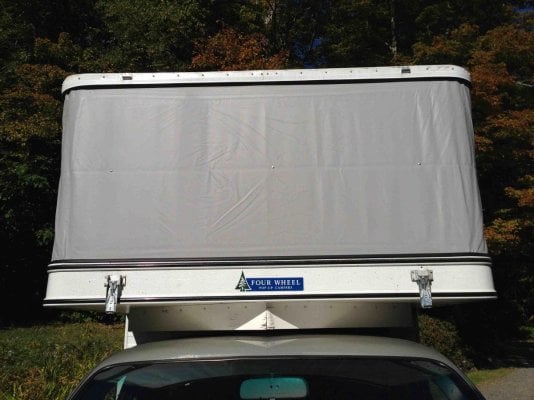
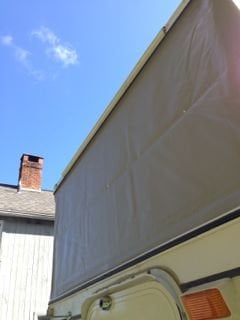
The distance when opened is 29 ½ " vertically. It is indeed 40" from the clamp hook on the roof (besides which one mounts the top bracket) to the center of the wall above the rear door. (usable horizontal space = 60" above both door and roof edge horizontally).
Hey Frank, I'm Rob and Buckland is my town's name!But I kinda like the Mr. Buckland...sounds like I'm the mayor!Still sounds like you can place the 36"/40# struts on your camper if you have just some simple tools.
It's so easy to install them yourself.
You shouldn't be dissatisfied with the struts ,as Ski said just measure out 36" from the center bottom and see where the top gets mounted.
Frank
Alley-Kat
Elder Statesman
Here is a thread about the FWC repair to install reinforcing plates on those that had the original mounts.Casa Escarlata Robles Too said:One question, do the FWC campers now come with per installed strut mounts?
Frank
External Roof Lift Assist Repair.
Look at the photos in message #6 by Ted.
You can also open the PDF from FWC that is in message #1.
OP
OP
Thanks Frank and Ski ... I do believe that would be the best idea... $60 as opposed to $400! I would think the angle created by the difference in height of only an inch or two could not make a difference in lift that would be that noticeable. (4" on the diagonal strut would be approx. 3.4" less on the horizontal for bracket). I did read the reinforced thread and all the pdf's ... it was just the strut length difference by model (and there high price difference) I was perplexed about.
You can bet I'll post the install photos and any suggestions from the experience for fellow DYI folks who might have the same idea.
Please continues to offer suggestions if you have insights.
PS
Brenda said the campers come with the "rivnuts" now which are tapped into the frame and are then capped and then can be used to mount the brackets ( with ball socket) if one wants.... so yes they are pre measured to fit the 36" or the 40" struts depending on the model (see pdf I attached previously)
Rob what Brenda told you now makes sorta sense, but you should be able to use the brackets from Suspa to mount the struts,I think.buckland said:PS
Brenda said the campers come with the "rivnuts" now which are tapped into the frame and are then capped and then can be used to mount the brackets ( with ball socket) if one wants.... so yes they are pre measured to fit the 36" or the 40" struts depending on the model (see pdf I attached previously)
Keep us posted.
I am glad you have gotten some answers to your questions and the WTW members were of some help.
Frank
OP
OP
Well, after purchasing the hardware from 4 different sources and buying the 40" struts from FWC, I started all the pre measuring to be sure all would go as planned. I have found that the 2011 Eagles have 2 issues:
The front roof clamp latches need to be moved out approximately 3 " for there to be enough room to accommodate the 40" strut i.e. the top of the strut where it is attached to the roof needs to be right where the latch is (wouldn't ya know). On the back wall above the door, I believe I might have to remove the drip edge and cut a few inches off each end.
I have tried to ask FWC for info but received only one word answers... really.
So my questions are to 2011 Eagle owners have struts or to anyone who has moved the latches for some reason, please let me know anything to avoid. Where does one get the gray sticky putty tape that goes beneath the clamp and is the roof latch also cemented to the roof? If so what kind would I user? Any other advice would be appreciated too.
I will move the bottom clamps over using the left screw holes for the right screws...avoiding 2 extra drill holes.
Sure hope all this will be worth it in the end.... in for a penny in for a pound.
Attachments
Until you get an answer from somebody who actually knows what they're talking about... the grey tape stuff is called butyl tape, and I think some people call it Dicor (I'm more confident about the "butyl tape"). You can get it at Camping World, and I'm sure you can find it online. From what I hear, you don't want to get the cheap stuff.
Good luck with the project.
Good luck with the project.
craig333
Riley's Human
OP
OP
After a lot of investigating and assembling the parts I have finished installing the lift supports. I made a photo of each step and captions to explain what I did. I put this in a PDF file so it would be less than 500kb to up load... not sure how else to do it. I have seen folks put slide shows of trips and wonder if I am missing the file size or correct process. I would love to know how.
Attachments
Rob,looks like you have it all figured out.
Did you use the 40" struts?
How do you like the "lifting"
Frank
Did you use the 40" struts?
How do you like the "lifting"
Frank
OP
OP
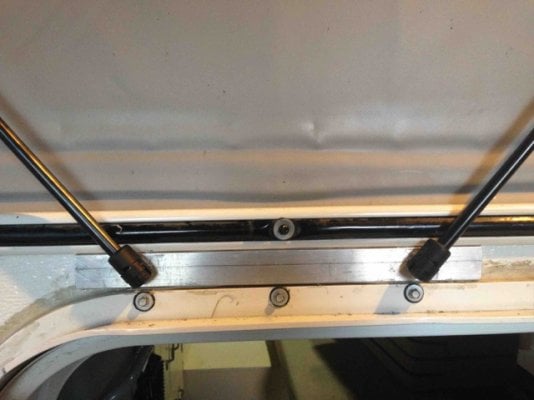
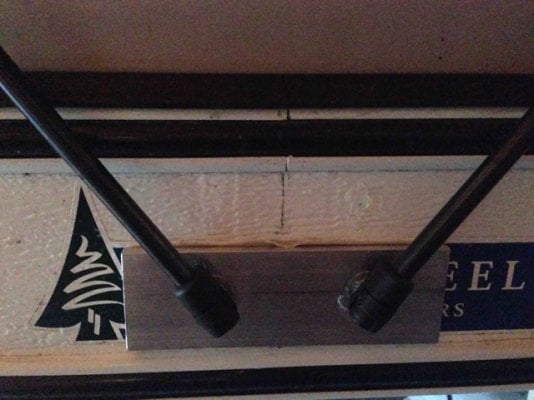
For those that have looked at the pdf file of the process ... the last part shows the angle of the strut...i.e. it is not 90º with the floor and the barrel shaft is rubbing against the roof lip.... the lower ball brackets are too far in or the off set bracket at the top too far out...either way I decided to put a ¼" aluminum flat stock on the lower to bring it out so there is not contact. For those of differing model years this might have to be your solution as well. Each step seems to be a learning curve.
The 'lifting;' is not as easy as I had hoped... I think this maybe due to the rubbing so it is not going up freely. I sure hope this corrects that. More to come in the next few days.
The 'lifting;' is not as easy as I had hoped... I think this maybe due to the rubbing so it is not going up freely. I sure hope this corrects that. More to come in the next few days.
BobM
Senior Member
- Joined
- Nov 2, 2011
- Messages
- 730
Here's a video I did today showing how easy it is to lift the roof with a Pro Audio speaker stand and a power drill. I don't have lift struts on my rig and don't need them.
The stand can be purchased here On-Stage SS8800B+ Power Crank-Up Speaker Stand | Guitar Center Just drill out the tripod because all you need is the pole. Save the rubber feet from the tripod to put on the ends of the pole
The stand can be purchased here On-Stage SS8800B+ Power Crank-Up Speaker Stand | Guitar Center Just drill out the tripod because all you need is the pole. Save the rubber feet from the tripod to put on the ends of the pole
OP
OP
I have used one since I got the camper ... it works great. With the added weight of the Yakima system, gas tanks and canoe you will hear the crank strain under the weight... it is a very light weight aluminum gear. If the roof was stock it worked great. This isn't the case anymore. I used the tripod I removed to set up a solar panel so that I could place it in the sun...camper in shade; that's another string posting.
OP
OP
I know ... a long row to hoe... but making progress. I bought the ¼" flat stock aluminum ($6) 1x12" rear and 2x6" front. This kicked the struts out and also gave a considerable amount of strength to the base. It worked fine. My only concern has been with the rear lift panels 'popping' out when I release the front. It also has to be "popped" in when opening (meaning it is not at max height). The struts went on easily, exactly 40" with the template. Perhaps the one rear panel, which has a slight bow in it, needs a little time to relax without the tension of the weight, now released with the strut, on top. I will include a few shots to show the step out plates added and the angle of the struts now closer to 90º.
Attachments
I have a solar panel, 4 Yakima bars, and a basket case on the roof of my Grandby and use 2 internal 100# struts to make lifting it easier. When the top is loaded with kayak and other things, I lift the rear manually and use the crank to lift the front. The front can be raised manually when loaded but it's a pretty good lift. The internal struts take a lot of strain off the hand crank.buckland said:I have used one since I got the camper ... it works great. With the added weight of the Yakima system, gas tanks and canoe you will hear the crank strain under the weight... it is a very light weight aluminum gear. If the roof was stock it worked great. This isn't the case anymore. I used the tripod I removed to set up a solar panel so that I could place it in the sun...camper in shade; that's another string posting.
Working on a Hawk. We will have two sea kayaks on top plus the Yakima rack - about 150#s. When setting up camp, will definitely off load before lifting, but in transit, they will have to stay on. Is four 40# lifters going to be enough? Maybe 50#s on front, or all around?
As for the need to pull the top down when the boats aren't on, why not mount a handle on the interior wood push plates on the ceiling?
As for the need to pull the top down when the boats aren't on, why not mount a handle on the interior wood push plates on the ceiling?
craig333
Riley's Human
Only having my kayak on occasionally the 40's are fine. A bit more effort. With two and having them on all the time I'd go with the 50's.
Similar threads - WTW
- Black914
- Four Wheel Camper Discussions
- Replies: 2
- Views: 267
- Wildcat
- Gear Exchange
- Replies: 1
- Views: 196