Tricks for attaching gear, etc. to the outside of an ATC?

h2opup

Advanced Member
Joined
Apr 18, 2024
Messages
53
Location
Oregon Coast
I see lots of nifty ideas on this site about people strapping shovels, etc., onto the outside walls of their pop-up campers, but I am wondering what is the best way to do this?

When I collected my Ocelot from Marty recently, I asked him about this. He looked a bit horrified and said the framing is "very small", and that adding weight in this way was not a good idea(??). I did have extra support put into the left side back wall during the build to possibly add a Rotopax in the future. Marty pointed that out and said that was the only place in the rig with solid support for added gear.

What is the trick for adding other gear?

Thanks.
 
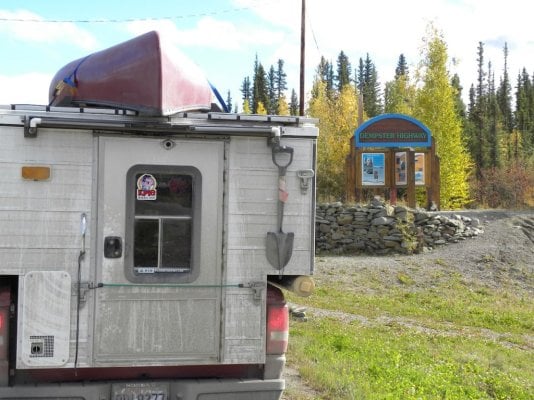
This is how I carry my small camp shovel.Just hangs from the door stopper.
It's out of the way and easy to get hold of.
Frank
 

Attachments

  • DSCN3745.jpeg
    DSCN3745.jpeg
    183 KB · Views: 33
I'm trying to minimize what I put on the roof for weight. I'm not sure I know what you mean about hanging something off of a rear jack mount?
 
I'm toying with idea to mount shovel and axe underneath the part that overhangs the truck cab. There are a couple inches between roof of a Tacoma and bottom of a Fleet to allow a shovel and axe to fit. There appears to be a sturdy piece of plywood supporting the sleep platform. Idea is to use the wood threaded inserts into the plywood and then use fist clamps to hold the items. Anyone else mount to bottom of the overhang like this?

Also Before I start drilling. does anyone know how thick the plywood is this region?
 
I'm trying to minimize what I put on the roof for weight. I'm not sure I know what you mean about hanging something off of a rear jack mount?
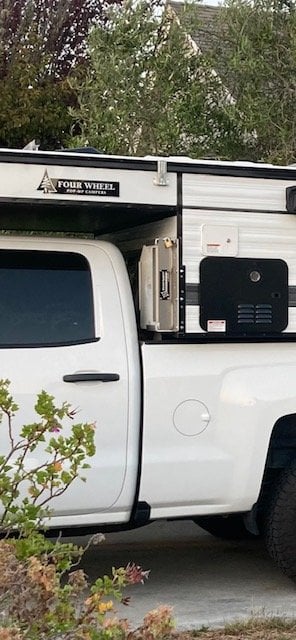
There are a variety of accessories that can be mounted to the jack brackets. With the jacks removed, you just bolt them to the existing holes. FWC use to offer a shovel/axe combo that mounted there. I don't see it in their current inventory though. May be worth a call to them. I have two mounts on my front brackets for my Rotopax water cans.
 

Attachments

  • IMG_1659 (1).jpg
    IMG_1659 (1).jpg
    72.3 KB · Views: 16
I'm toying with idea to mount shovel and axe underneath the part that overhangs the truck cab. There are a couple inches between roof of a Tacoma and bottom of a Fleet to allow a shovel and axe to fit. There appears to be a sturdy piece of plywood supporting the sleep platform. Idea is to use the wood threaded inserts into the plywood and then use fist clamps to hold the items. Anyone else mount to bottom of the overhang like this?

Also Before I start drilling. does anyone know how thick the plywood is this region?
I could picture that working for some rigs, but mine doesn't have adequate clearance.
 
mule makes brkts that attach to the jack brkts, and you can then attach an awning to these. you could also probably connect the front and rear with an L track, or 8020.
 
Agreed - I found the Mule brackets through the link Wandering Sagebrush sent and they look great. Spendy, but I'm not set-up to machine things like that on my own, so might just bite the bullet.

I like the idea of L-track or similar connecting front to rear - might be a good spot for a hi-lift.
 
I constructed frames of 80/20 on the back of my Bobcat. The primary support is the from the jack brackets, with other supports screwed into the framing around the door.
full


Here are some of the things I use the frames for.
full

full

full

full


It was a bit tricky figuring out how to create clearance and mount the frames. I had to move lights, but I didn't want to have to mess with my lift panels inside to get access to the wires behind the wall panels. So I made some exterior extensions for the lights. I am sure that is not the best practice, but so far, so good. I have used the camper for a dozen trips or so this summer since building the frames, and the lights are still working. If I have trouble with the external wiring, I'll just have to do the extra work inside the camper so I can pull the wall panels and route the wiring where I want it.

But for now I am enjoying the versatility of the 80/20 to give me external storage and camping options. When I get an idea of adding something, I can relatively easily iterate through several trial and error solutions until I get the one that works best.

I also use the frame for a DIY awning. That is the gutter and curved conduit at the top.

I can do some more detailed pictures with explanations if anyone is interested. That will take me awhile to put together.
 
Last edited:
nice work drum. i am a big fan of the 8020. used it in my old pop up for interior shelving/cabinet. if i did another atc pop up, i would have them run jack brkts all the way to the top on all 4 corners, as this gives many spots to attach 80/20. also manybe some supports in intermediate areas with exposed nutserts.
 
Many thanks drumwood for the detailed photos and work plan. I really like the versatility of this idea.

Time for me to get creative and stop worrying (too much) about punching holes through a brand new camper.:p
 
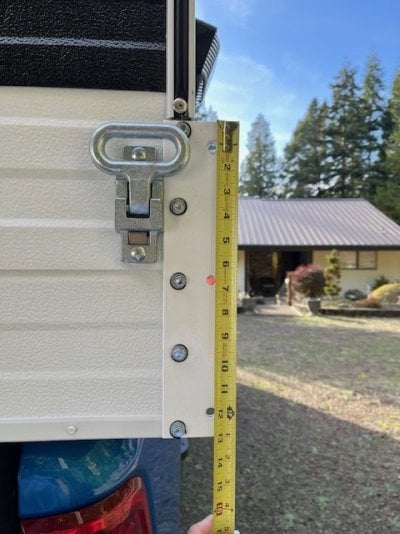
Unfortunately my rear step placement is going to interfere with some of the available jack bracket attachments.
 

Attachments

  • rear step placement.jpg
    rear step placement.jpg
    67.4 KB · Views: 5

Try RV LIFE Pro Free for 7 Days

  • New Ad-Free experience on this RV LIFE Community.
  • Plan the best RV Safe travel with RV LIFE Trip Wizard.
  • Navigate with our RV Safe GPS mobile app.
  • and much more...
Try RV Life Pro Today
Back
Top Bottom