Frank, thanks! Looks doable, even by meCasa Escarlata Robles Too said:

")
Frank, thanks! Looks doable, even by meCasa Escarlata Robles Too said:
If I can do it anybody can.Wandering Sagebrush said:Frank, thanks! Looks doable, even by me


That's a great mod!OregonOzzy said:While removing the cabinet front multiple times to replace the fresh water tank hose/sink drain/pump hose/etc, finally dawned on me that there has to be a better use for the screw heads. Now they sport the clip for hanging stuff. Purchased for <$3 at Tandy Leather Factory. Similar treatment to the bolt heads projecting from above the mirror on the rear lift panel. 4 nuts added with an assortment of hooks and D-Rings purchased at the local ACE hardware for <$5. Happy with multiple hanging options now.


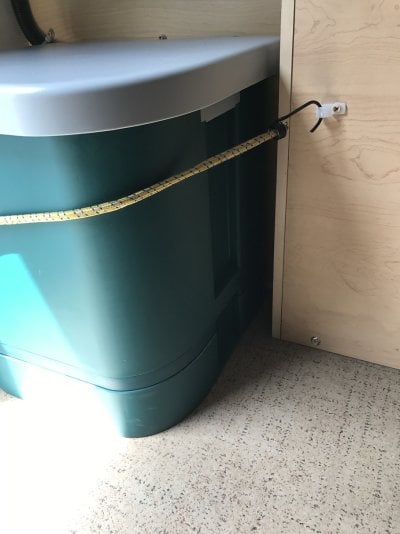
munchmeister said:I'm a little slow at times so pardon me if you all already figured this out, but the bungee cord that must be stretched between the window coverings when you take the top down, also fits nicely across the back panels. I put a roll of paper towels up there and use some of those cheap carabiners to hold other stuff. That's about as cheap as it gets!
$0.00 cost is the ultimate Low Cost Mod. Kudos!munchmeister said:I'm a little slow at times so pardon me if you all already figured this out, but the bungee cord that must be stretched between the window coverings when you take the top down, also fits nicely across the back panels. I put a roll of paper towels up there and use some of those cheap carabiners to hold other stuff. That's about as cheap as it gets!

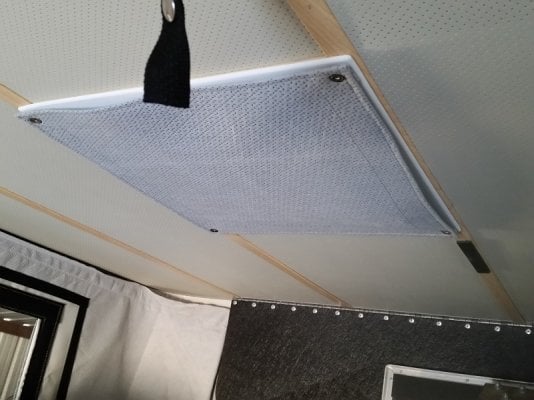
Nice work!XJINTX said:Not sure if it bothers anyone else but does us. When trying to lay down on bed during HOT Texas summers the sun blasts in. The vents with tinted covers just don't block the sun / heat. So we bought a yard of the same material used in the thermal liner. Took measurments and asked friend to sew them up for us. Then I just added snaps that I bought at Lowes... the tool to install come with snaps. I replaced the screws that hold the plastic screen on. Same size flat head worked great. Now we can just snap in place to block sun and remove if not needed and vents open.