Frank, thanks! Looks doable, even by meCasa Escarlata Robles Too said:
You are using an out of date browser. It may not display this or other websites correctly.
You should upgrade or use an alternative browser.
You should upgrade or use an alternative browser.
Low Cost Mods
- Thread starter Lighthawk
- Start date
If I can do it anybody can.Wandering Sagebrush said:Frank, thanks! Looks doable, even by me
Frank
munchmeister
Advanced Member
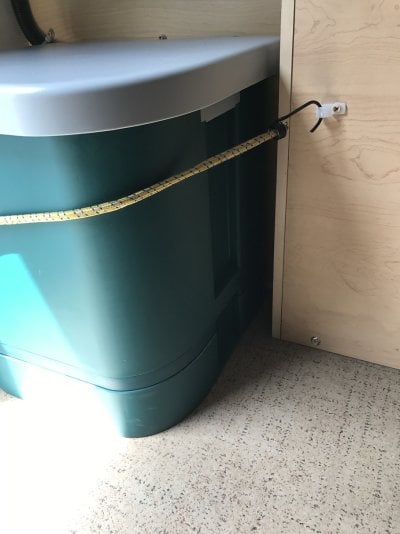
Cheapo way to add loops to attach small bungees, etc. These are small nylon "R" clamps, universally available at Ace, Home Depot, in the electrical supplies section. I put them where there were existing screws, replacing the beauty washers so I did not lose screw purchase.
Work well for those small bungees to keep the trash can and porti potty in place.
Work well for those small bungees to keep the trash can and porti potty in place.
Attachments
la_morris
Advanced Member
Thank you for posting the photo. I didn't have a clue what an "R" clamp was. Nifty.
munchmeister
Advanced Member
Tomato, tomahto. 
ntsqd
Custom User Title
I've long called them by one (original?) mfg's name, "Adel clamp." Never heard "P" or "R" until now.
munchmeister
Advanced Member
Ball bungees (or whatever you all want to call them) work well for temporary mounting of things like this small 12v fan on the roof push up board. I mounted this so it is close to me so it is moving air where it has the most impact --on me! The dual fans allow the 2nd one to be pointed down to the "guest bedroom" keepin them happy too! The cord is routed using the Velcro grommet hack mentioned earlier in this thread (great idea, BTW) and goes down to my Goal Zero Yeti 400 which provides plenty of power for this fan, with ~ .6 amp draw.


OregonOzzy
Advanced Member
While removing the cabinet front multiple times to replace the fresh water tank hose/sink drain/pump hose/etc, finally dawned on me that there has to be a better use for the screw heads. Now they sport the clip for hanging stuff. Purchased for <$3 at Tandy Leather Factory. Similar treatment to the bolt heads projecting from above the mirror on the rear lift panel. 4 nuts added with an assortment of hooks and D-Rings purchased at the local ACE hardware for <$5. Happy with multiple hanging options now.


hoyden
Lady Bug
That's a great mod!OregonOzzy said:While removing the cabinet front multiple times to replace the fresh water tank hose/sink drain/pump hose/etc, finally dawned on me that there has to be a better use for the screw heads. Now they sport the clip for hanging stuff. Purchased for <$3 at Tandy Leather Factory. Similar treatment to the bolt heads projecting from above the mirror on the rear lift panel. 4 nuts added with an assortment of hooks and D-Rings purchased at the local ACE hardware for <$5. Happy with multiple hanging options now.
CougarCouple
Senior Member
Hello OO
X's 2 on a cool mod gunna see where it might benefit us.
Russ
X's 2 on a cool mod gunna see where it might benefit us.
Russ
ofc11066
Advanced Member
Squatch
Senior Member
Nylon eye straps are great for bungee's and cheap. That's what I use.
https://www.amazon.com/Shoreline-Marine-Nylon-Eye-Strap/dp/B00JHHUAWA
They can also be had as footman's loops for web straps.
https://www.amazon.com/H2o-Webbing-Bridge-Nylon-Footmans/dp/B00APXK61A/ref=sr_1_1?ie=UTF8&qid=1503768279&sr=8-1&keywords=nylon+footmans+loop
And of course both are available in stainless steel as well.
munchmeister
Advanced Member
I'm a little slow at times so pardon me if you all already figured this out, but the bungee cord that must be stretched between the window coverings when you take the top down, also fits nicely across the back panels. I put a roll of paper towels up there and use some of those cheap carabiners to hold other stuff. That's about as cheap as it gets!


hoyden
Lady Bug
BRILLIANT!
I'm gonna try this when I drive out to the Overland Expo east this week! Neat!
I'm gonna try this when I drive out to the Overland Expo east this week! Neat!
munchmeister said:I'm a little slow at times so pardon me if you all already figured this out, but the bungee cord that must be stretched between the window coverings when you take the top down, also fits nicely across the back panels. I put a roll of paper towels up there and use some of those cheap carabiners to hold other stuff. That's about as cheap as it gets!
Lighthawk
Weekend warrior
$0.00 cost is the ultimate Low Cost Mod. Kudos!munchmeister said:I'm a little slow at times so pardon me if you all already figured this out, but the bungee cord that must be stretched between the window coverings when you take the top down, also fits nicely across the back panels. I put a roll of paper towels up there and use some of those cheap carabiners to hold other stuff. That's about as cheap as it gets!


We sometimes rig our bungee from the rear wall knob (clove hitch) to the fantastic fan as a clothes line for wet rain gear, etc.
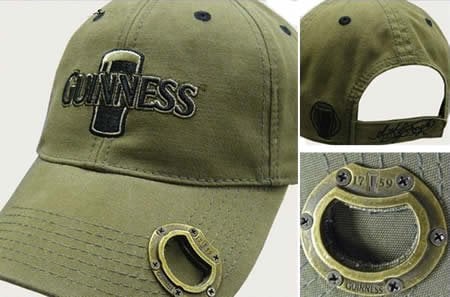
This isn't a mod per se, but I picked up a combo belt/bottle opener and haven't travelled without it since! $12 in some places online, I got mine - which should still be under $25 - at REI with a gift certificate, so in my case it was free.
Says 'unisex' but fyi for anyone looking I found it in the mens' department. And I've thrashed mine at chalk festivals, it cleans up well.
Have literally been hanging out with a couple of friends when one says, " Does anyone have a bottle opener?" Me: " Why YES! Hold on..." Hahahahaha

Preparation is key...
Says 'unisex' but fyi for anyone looking I found it in the mens' department. And I've thrashed mine at chalk festivals, it cleans up well.
Have literally been hanging out with a couple of friends when one says, " Does anyone have a bottle opener?" Me: " Why YES! Hold on..." Hahahahaha

Preparation is key...
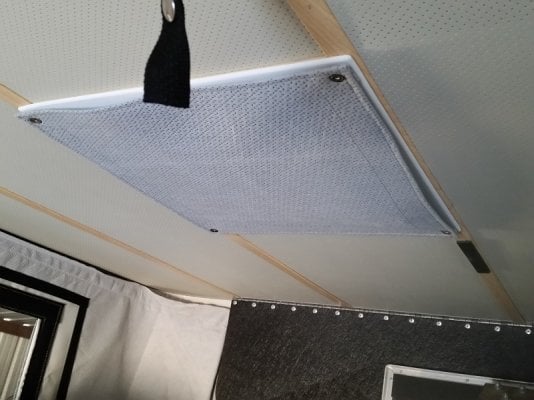
Not sure if it bothers anyone else but does us. When trying to lay down on bed during HOT Texas summers the sun blasts in. The vents with tinted covers just don't block the sun / heat. So we bought a yard of the same material used in the thermal liner. Took measurments and asked friend to sew them up for us. Then I just added snaps that I bought at Lowes... the tool to install come with snaps. I replaced the screws that hold the plastic screen on. Same size flat head worked great. Now we can just snap in place to block sun and remove if not needed and vents open.
Attachments
Nice work!XJINTX said:Not sure if it bothers anyone else but does us. When trying to lay down on bed during HOT Texas summers the sun blasts in. The vents with tinted covers just don't block the sun / heat. So we bought a yard of the same material used in the thermal liner. Took measurments and asked friend to sew them up for us. Then I just added snaps that I bought at Lowes... the tool to install come with snaps. I replaced the screws that hold the plastic screen on. Same size flat head worked great. Now we can just snap in place to block sun and remove if not needed and vents open.
Similar threads
- Shap
- Four Wheel Camper Discussions
- Replies: 4
- Views: 649
- crashmaster
- Electrical, Charging, Solar, Batteries and Generat
- Replies: 4
- Views: 469
- Glenn
- Electrical, Charging, Solar, Batteries and Generat
- Replies: 3
- Views: 552
Try RV LIFE Pro Free for 7 Days
- New Ad-Free experience on this RV LIFE Community.
- Plan the best RV Safe travel with RV LIFE Trip Wizard.
- Navigate with our RV Safe GPS mobile app.
- and much more...


