Low Cost Mods

Nice solution.Andy why did they make such a small drawer?Is there room to make it larger? Seems like a waste of storage space.

Frank

My son-in-law is a cabinet maker so I had him replace all the drawers in the camper. They are now all deeper, taller and wider to utilize all available space. It has been a great improvement.
 
My son-in-law is a cabinet maker so I had him replace all the drawers in the camper. They are now all deeper, taller and wider to utilize all available space. It has been a great improvement.


The drawer above my ice box (soon to be fridge) in my Hawk is pitifully small considering how much space there is. I could fit probably a weeks worth of clothes in there, yet the drawer is only big enough for a small flisghlight and some paperwork. I'm not sure I'm handy enough to enlarge the opening, make a new drawer, etc. So a high priced mod involving a hired handyman/cabinet maker might be in my future.
 
I'll be honest, I didn't read this whole thread so this mod might have alreay been mentioned. In case it's not here's a little attachment I made to help the sink drain.

Many years ago I had a tent trailer that took forever for the sink to drain so I made an attachment out of PVC, a tee fitting and male and female hose fittings. The top of the tee acts as a vent so the sink drains faster. I noticed the Raven sink had the same problem so I made another one this weekend. Made it short enough to store on top of the holding tank of my new FWC Raven. Cost less than $5.oo to make:

IMG_0180.jpg
 
Tired of opening your camper door by having to push on the screen doors screen section (potentially bowing out the screen)?

Tired of not having a handy way to pull the door closed?

Here's a cheap solution for $12 bucks or so, an easy to install cross bar for the screen door:
http://www.campingworld.com/shopping/item/screen-door-cross-bar/35872

Here's some pics intalled:

screen door cross bar1.JPG
screen door cross bar2.JPG
screen door cross bar3.JPG
screen door cross bar4.JPG
 
Tired of opening your camper door by having to push on the screen doors screen section (potentially bowing out the screen)?

Tired of not having a handy way to pull the door closed?


What was the issue just using the metal handle? :unsure:
 
What was the issue just using the metal handle? :unsure:


When backing out of the door.....I was always pushing on the screen. Once the door was all the way open and I was inside.....it's very difficult to reach the metal handle.
 
Behold, my cheapest mod to date:

Step 1: Twist up wire hanger
IMG_0664.jpg


Step 2: Use as most convenient, out of way, hat holder ever. No more crushed hats!
IMG_0665.jpg


Also found that it works in the cab of the truck, between the liner/rear window and coat hook.

(Yes, I know- this hat is a little dirty/ragged. Who doesn't have a favorite hat though?)
 
Extra points awarded for items scavenged from the house! :LOL:

yeah, I think the wire hanger is worth more than the hat :D
 
Behold, my cheapest mod to date:

Step 1: Twist up wire hanger
IMG_0664.jpg


Step 2: Use as most convenient, out of way, hat holder ever. No more crushed hats!
IMG_0665.jpg


Also found that it works in the cab of the truck, between the liner/rear window and coat hook.

(Yes, I know- this hat is a little dirty/ragged. Who doesn't have a favorite hat though?)


I'll bet nobody can 'top' this one...
 
Behold, my cheapest mod to date:
[snip]
Also found that it works in the cab of the truck, between the liner/rear window and coat hook.

(Yes, I know- this hat is a little dirty/ragged. Who doesn't have a favorite hat though?)


Wire hangers have so many uses, and that is one of the best, least expensive mods I have seen. Before I read that you used it in the cab of the truck too, I was thinking that would be a good place for one. No more hanging my hat from a gun rack and having the brim deformed.
smile.gif
 
Nice. Thinking I need to copy this. Question though: how did you fix the wood to the wall?


Sorry for the tardy response. Other stuff kind of overtook getting to the forum.

In this case, the stove is behind the bracket. I removed the 4 screws holding the stove, slid it forward and then glued a scrap of 1/2" ply on the inside of the panel with construction adhesive. The factory 1/8" panel wouldn't have held the weight. I then screwed the bracket on from the inside using flathead screws with fender washers. Kind of overkill but I can be sure it won't ever come loose. The chunk of plywood I used was big enough to go over behind the fire extinguisher as well. The extinguisher is held on with 3/16" machine screws and once again, fender washers and nylon lock nuts on the inside of the plywood. All of the material was scrap around the shop. The hardest part was matching the colour of the finish on the bracket so it was the same as the factory panel.
 
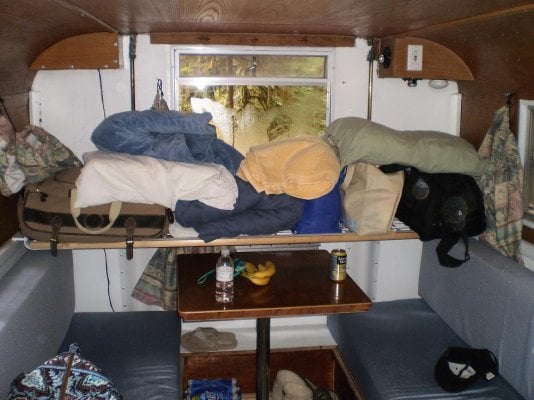
i just used my new fold up shelf in my 10'nco. it let us put up a bunch of stuff out of the way. with two of us ,the stuff piles up fast. this let us move around better.it only cost 4 bucks for hinges and used a scrap display shelf that was hanging around, but could be made out of any material and could be made strong enough for an extra bunk.

wes
 

Attachments

  • PB030012.JPG
    PB030012.JPG
    113 KB · Views: 998
Looks good Caseboy. Our two also manage to fill the camper with 'stuff' all too quick.
This is definitely a classic Low Cost Mod.
 
The under sink storage space in our '03 Hawk had a lot of open space. A simple shelf would resolve most of this. But we have been using the same kitchen gear for a few years now, so I built a shelving system specific to the items. I used old wooden wine boxes I had so cost was nothing.

Oh yeah, this also shows the doors I made. I hated the sliders. Used some oak trim pieces to make a frame and cut the sliders to fit inside the frame. Much better.

gallery_176_163_16338.jpg
 
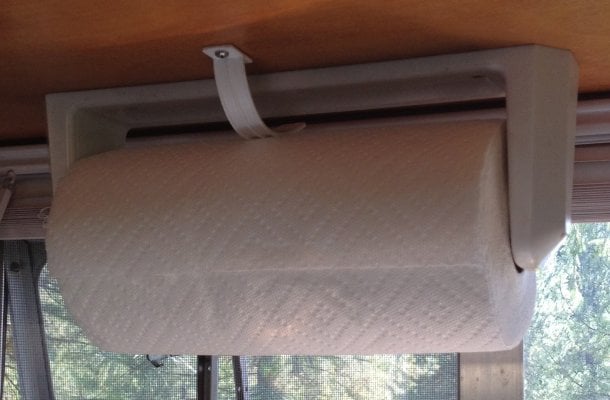
One thing which has bugged me from the first is how my paper towels unroll when the wind is blowing-particularly when the door is open. I took the plastic carrying handle from a television box, trimmed it and screwed it to the under side of the overhead cabined immediately above the towel holder. Not only does it stop the towels from unraveling, it provides just enough friction so you get a clean tear instead of pulling half of the roll off.

Mike
 

Attachments

  • IMG_0985.jpg
    IMG_0985.jpg
    438.2 KB · Views: 553
Great idea you got there Mike.


One thing which has bugged me from the first is how my paper towels unroll when the wind is blowing-particularly when the door is open. I took the plastic carrying handle from a television box, trimmed it and screwed it to the under side of the overhead cabined immediately above the towel holder. Not only does it stop the towels from unraveling, it provides just enough friction so you get a clean tear instead of pulling half of the roll off.

Mike
 
Back
Top Bottom