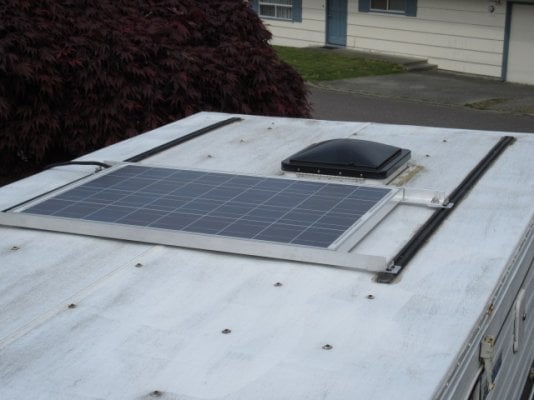
Update: Make that 1"x1"x1/8" "Z" bar. 3/16" would have been overkill, if i could even have found it. The 1"x1"x1/8" "Z" bar was harder to find than I expected. Finally located it online at Orange Aluminum. Gonna cost me more than the piece itself to ship it up here from CA. Oh well.... Decided to buy just one 6' piece, cut it in half for front and rear mount rails. That'll leave a couple inches of panel hanging out on either side. Don't think that will generate enough lift to pull the thing off the roof. 1/8" stock seems pretty herky.
Latest quandary: Finally realized that, duh, the loose red and black 12 ga. wires coiled up and duct taped to the top of the water tank must be the leads from the ZAMP/SAE connector on the roof! Problem is, it looks like they go from the roof connector clear up to the front of the roof, down behind the front lift panels, through the outside wall all the way back to the furnace cabinet, and then back inside the cabinet to the H2O tank/battery compartment. I'm thinking that's 25' or more, which would give me a loss greater than 3% of rated panel output of 17.9 V/8.38 A. Not sure why FourWH uses such a long, convoluted run. I'd love to run 10 ga. wire instead, but have no idea what that would entail.
Questions:
How much does the output loss really matter?
Would it be possible to 1) remove the roof connector 2) use the existing 12 ga leads to pull the 10 ga wires from the hole in the roof to where they enter the camper behind the front lift panels 3) feed the 10 ga wires through the black plastic flex conduit behind the lift panels 4) open up the outside wall at the back of the sink/storage cabinet, intercept the 12 ga. wires from the roof connector, and use them to pull the 10 ga. wires into the back of the cabinet 5) run the 10 ga. the rest of the way to the SC2030 controller installed in the battery compartment (i think there's actually enough room there underneath where I put the TM2030 shunt on the front wall)?
Has anyone used an alternate wire routing from the roof connector to their solar charge controller?
Would it help if I put the SC2030 in back of the furnace cabinet instead, tapped into the 12 ga. leads there (shorter run from panel on roof) and then ran 10 ga. from the SC2030 back to the shunt and battery (plus the phone cable to connect with the TM 2030 where the old battery monitor used to be)?
Yeah, I'm kind of a nervous nellie when it comes to this kind of stuff. Thanks to all for your patience!