BluesideUp Alaskan Project

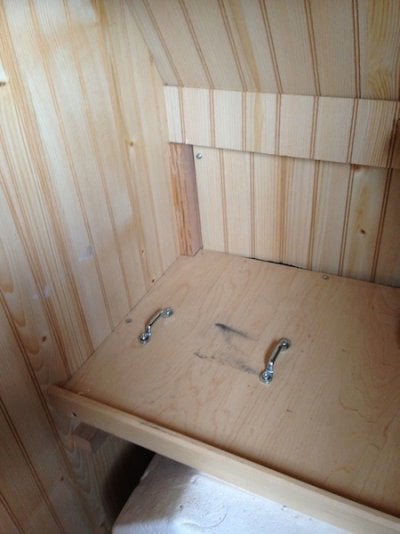
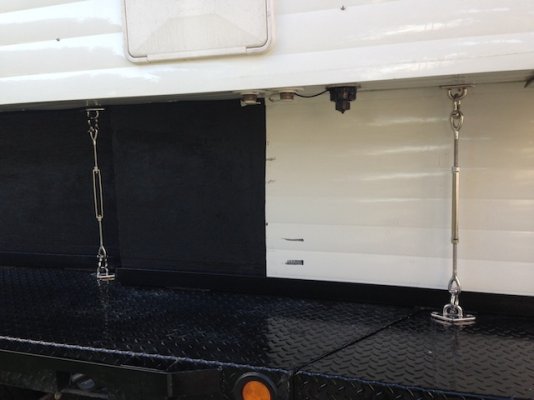
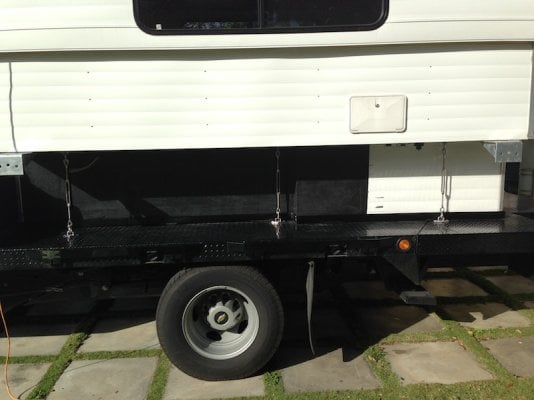
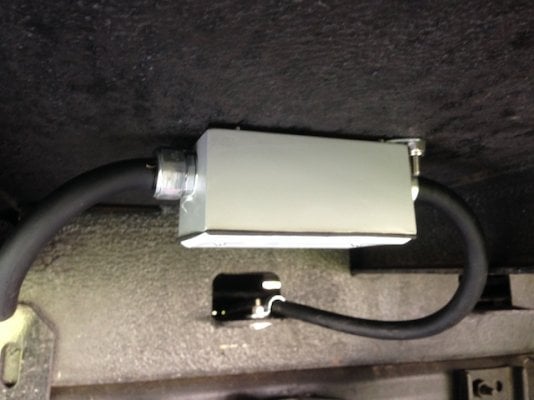
Installing tie downs so jack pads can be removed and make way for three 3' aluminum storage doors each side.

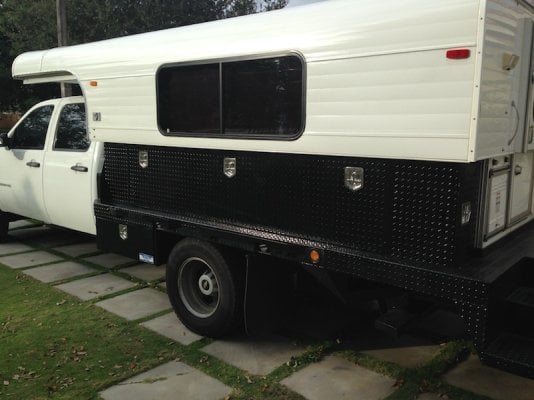
The doors will be mounted on an angle iron frame inside of the camper drip line and basically allow secure storage of items in plastic tubs directly on the flat bed or bungeed to the camper sides. As well has extra propane etc, etc.

Hopefully be finished before end of year.

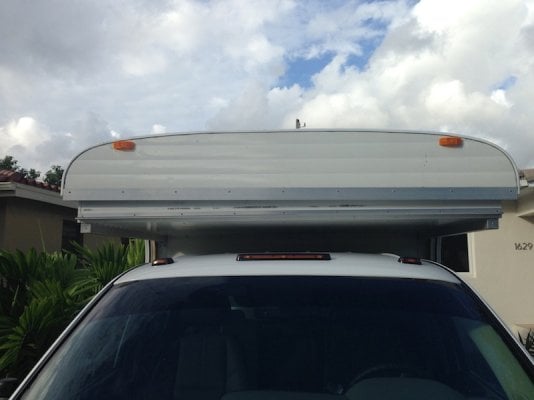
On a side note once the camper was mounted in the custom frame, rather than on 1 x 4" slats the vibration / lifting etc in the cab over went to a minimum on the drive upto ORL & back
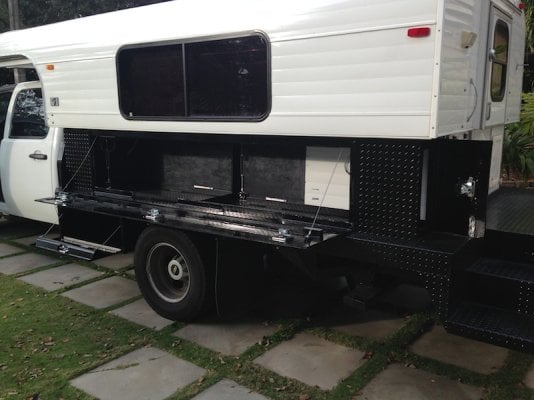
 

Attachments

  • IMG_2161.JPG
    IMG_2161.JPG
    69.2 KB · Views: 228
  • IMG_2162.JPG
    IMG_2162.JPG
    110.1 KB · Views: 248
Installed waterproof bell box to join two 7 pin connectors under flat bed to power camper from truck.

Only 4 pins in use on camper and they have to be swapped to marry up correctly.

Any feedback on a battery isolator install would be appreciated
 

Attachments

  • IMG_2173.jpg
    IMG_2173.jpg
    81.9 KB · Views: 209
BluesideUp said:
Installed waterproof bell box
It is not waterproof with the non waterproof connector on it. Now with any moister that gets in through the connector will be trapped inside your box.
 
Thanks, sealant put inside connector once cable installed into box.

24 hrs later…..

As the saying goes (after a good night's sleep) " half measures gets you nothing" I followed wiser minds

and went to an electrical supply house and purchased a 3/4" box with 1/2" compression fittings and a reducer

Thank You Buckwheat!
 

Attachments

  • IMG_2184.JPG
    IMG_2184.JPG
    74.9 KB · Views: 204
Storage Boxes complete.

Aluminum Deck box is 10.5 ' long x 22" high with single side 8' door and 10" rear door.

Interior depth is 16" then reduces to 11"

Deck door frame provides additional lateral support for camper shell and has 1" solid rubber compressed to 1/2"

between frame and camper to prevent metal to metal contact

Steel under body box is 36" x 18" x 18" .
.
 

Attachments

  • IMG_2278.JPG
    IMG_2278.JPG
    132.6 KB · Views: 260
  • IMG_2279.JPG
    IMG_2279.JPG
    127.3 KB · Views: 302
Wow...do I wish I had that kind of storage...very nice....

(self adhesive 12v led strip lighting is on sale at Kmart...in the marine and auto sections...for inside the storage areas...more than 1/2 off)

I can see Manfred's excited about this as well.....that is going to be one sweet camper...no more diaper ;)
 
Great lead thanks. I was trying to figure out what to do about lighting. I just upgraded all my interior lights with

LED bulbs and put 20% tint on all the windows to combat heat. That's just what I need for night time access.

Purchased a replacement MaxFan for my intermittent forward fan and a set of Lund Nerf Oval straight bars for

truck access which I will install this weekend.
 
Got a 2" receiver welded in the aft deck for a bike rack. This way its high and out of the way. I still have

to move the existing 2" trailer hitch receiver and electric so if I want to tow a trailer or small jeep I can.

.
 

Attachments

  • IMG_2283.JPG
    IMG_2283.JPG
    133.9 KB · Views: 154
Loose Pre Charge Water Bottle for Pex Heating system.

Took some foam and a 38" battery strap with hardware and secured it, will adjust and secure plumbing next.

.
 

Attachments

  • IMG_2294.JPG
    IMG_2294.JPG
    61.4 KB · Views: 157
  • IMG_2290.jpg
    IMG_2290.jpg
    72 KB · Views: 173
Rusty, I am looking at solar panels etc and am curious as to how you and other owners not only secure the solar panels to the roof but how you route cables through the roof?
 
I'm looking at the same project myself...my son gave me 2-30 watt panels for Christmas and I'm looking at my options. I already have an external antenna on the front so I'm removing that and wiring through that hole. It passes through into the drivers side storage area and I can get it to the CB box from there....then down to the lower section via an extension cord on a bungie...through the closet and to the floor...then forward to the battery area.

As for mounting the panels...I'm searching for an aluminum extrusion which will bolt to the face of the upper section behind the drip edge and make the 90 degrees to the front of the upper...then slip the panels in or screw on the frame and bolt to the front of the camper. Rear support in my case will be a combination of polyurethane adhesive and E6000....I'm not drilling into the top for rear support of the panels...they're not that big nor are they heavy...the poly will keep the trailing edge attached to the camper and the E6000 to the Aluminum frame.

That electrical diagram I posted will get me in the door for simplicity...the selection of the appropriate controller is the key and my son is selecting that one.

The real question and we're hashing this one out on another site....is whether the panels are really needed....I've got 10 days on battery right now with 1-12v deep cycle....if I go any longer I have a Honda generator...which will in turn, charge the battery automatically when the camper is plugged in. The panels just provide a constant charging to cap the battery and allow a bit longer on the road....

What I've found is this....about every 7-10 days or so...We need a break...and so I find a place to rest and plug in/shower/ wash clothes/etc.....this usually allows my wife and I enough time to recharge the batt and off we go...is the solar system really necessary for such a small draw....but the purist in me comes back to the solar panels every time ;)
 
Thanks. I got a reply back from Bryan on this.

He said they now use Sika-Flex instead of fasteners and just clean the area and glue the panels mounts down directly to the roof.

He states as a test he bonded some aluminum extrusions together and after drying he could not hammer them apart.

He will also shoot me some measurements and photos on where to make the cable run when I am ready to install

I initially thought I would just go with a good battery and generator but one thing has led to another. I dislike noise and while a solar system is pricey it makes for being a good neighbor even when no one is around

After reading as much as I could find on batteries I have decided on deep cycle high cranking amp AGM's in the truck. My existing truck battery is a Delco flooded cell and it is not recommended to mix battery types so I will change it out

My son has a speed shop so I am able to take advantage of certain items at wholesale

I have an empty battery tray in the engine compartment since I have a gas engine and not diesel, so I will be installing the second truck battery with an isolator to run any truck accessories that might come later,

As of now the alternator charges both the truck and camper battery when running. That will change when solar goes in

For the camper battery I am looking at a Sun Xtender 12v deep cycle AGM which is a solar specific battery and if I need more amps I can parallel a second.

I nixed the idea of 6V in series because if I need to increase reserves I would have to parallel a second set and my price comparisons showed 12v volt to be more cost effective

I will mount the house battery in a battery box outside the camper and use the space in the camper for solar components

I am looking at several makes of Solar but like Go Power mainly because its a matched system.

But I have to say that I am starting to feel like a ATM
 
Having trouble getting the front in sync with the rear going up and down, the front left lags going up and leads going down. Going down the rear jacks start to slow down and bind

The reservoir was down about 2.5 " so I bought it up to 1" and bled the system but still out of level.

The RH rear piston retaining bolt was loose and both upper front brackets had one clamp screw missing and one partially out.

Bryan thinks at one point someone tried to raise the top with the travel bolt in which impacted the LH lift cylinder.

That was sort of the issue which started this because the upper shell bolt hole was one width below the lower bracket hole.

What I though I would do is zero out both valves fully closed then open them identical revolutions so I am starting from a matched openings then adjust accordingly.

Any suggestions would be greatly appreciated
 

Attachments

  • IMG_2305.jpg
    IMG_2305.jpg
    90.7 KB · Views: 176
I have the same problem. Just can not seem to balance both up and down so I set both my valves to work even going up. The front comes down first so I have a bunjee cord (that keeps my door open on the rear) that I pull on for the first 2 in. or so then it comes down even. I tryed everything for a while to fix it but it just didn't improve so I will live with it. Some times its just not wortth the bother.

When the weather gets better I will rebuild all my rams that may fix the problem. I have not done much maintanace on the camper in a couple of years so this is the year.
 
Thanks. The same.

I closed the valves and after experimenting with 2,3 4 revolutions settled on 2.5 but still could not get dialed in so when all else fails I went back and read the instructions.

Perfect!

After setting at 2 revolutions open on both I used the rear adjustment to level going up so both front and back arrived that their full extension at the same time then the front adjustment so the front and the back arrived at the bottom at the same time.

They are not kidding when they say turn 1/8 at a time
 
Your site is really a wealth of information and much appreciated. I looked at many variations of campers over the course of several years before deciding on an Alaskan but putting it all together is really a challenge and the input of others is invaluable so I hope what I am doing can help others
 
Got a question on wire gauge and alternator.

I am installing an aux battery in the empty battery tray on the LH side of the 6.0 gas engine compartment.

Both batteries are Odessy 12v 70A CCA 680 AGM. The positive battery cable will have a 150A fuse at each terminal with a VSR isolator in-between.

The negative on the aux will be grounded together with the primary negative on the block.

1. What gauge wire should I use?

I want to carry a spare alternator so I am looking to upgrade the OEM 125 Amp and use the OEM as a spare.

2. Any recommendations on Alternators?
 
Back
Top Bottom