Low Cost Mods

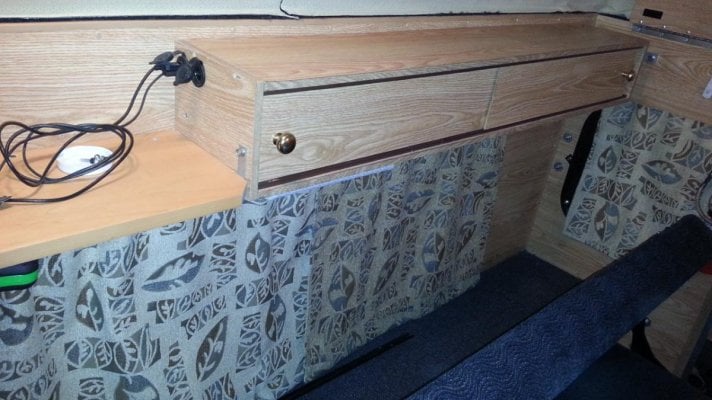
On my front dinette Grandby, the nice storage area above the water tank couldn't be accessed without removing both seating cushions. That rendered it pretty useless until I split the hinge and the storage door to allow it to open with the cushions in place. Now I can access it while seated at the dinette - which came in handy on the next trip when I needed a little first aid.


Links to my gallery photos

With the lid open

full

with the lid closed
full


I split the door side of the hinge at two spots with a cutoff wheel on a dremel tool, I split the door at the same two points with a fine tooth hand saw
 
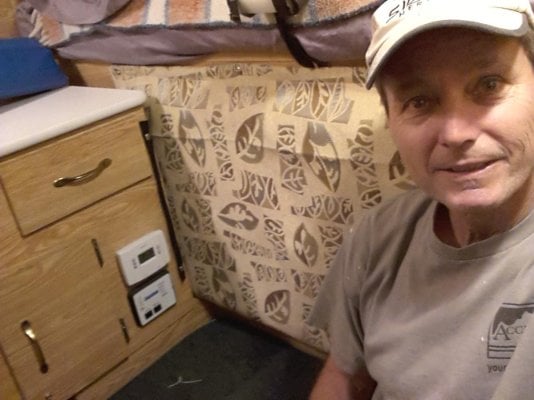
We returned from our annual DV winter trip determined to replace the stock FWC curtains. We also had a few ideas about improving the settee.

First stop was the local fabric store; Ben Franklin. I think they are part of a chain. We wanderedI the remnants looking for a heavy, upholstery grade fabric to help insulate the single pane, aluminum frame windows that FWC installs in their rigs. Reminds me of the state of construction standard from thirty years ago, when I installed hundreds of cold aluminum frame windows with single panes.

We lucked out and found 2 1/3 yds of material in earth tones with a pleasing print. We bought a large spool of poly blend, heavy grade thread. Total bill was just shy of $22 bucks! I think we're still running with the $25 budget for Low Cost Mods. :D

SR got busy with her restored Singer Featherweight I gave her a few years ago. She reused the guide strip for the OEM curtains with nylon dogs that glide in the aluminum tracks mounted over each fenestration. They look so much better than the white curtains from FWC, which were cheaper grade fabric and already dirty on our six year old camper.

The big win for us was to design a back support that would pad the front window. We have a swing around table and will both sit with our backs to the front of the camper. I've already extended the settee seat top by replacing the OEM seat with an extra piece of 5 ply birch plywood.

http://
http://

SR sewed a pocket into the fabric just large enough for a standard 48" x 21" thermarest (extra points for using materials already in your garage :p ) I used $5 package of screw-attached snap closures. Oh noes! I'm now up to $27 bucks!!! :eek:

The snaps are mounted in the top of the fabric, allowing quick install of the padded seat back, or removal. We figure we can open the thermorest valve and deflate the pad to stow it in the gap between the cabinet and the front of the camper.

http://


http://

Looking nice and comfy!
 

Attachments

  • 2015-03-21 16.31.19.jpg
    2015-03-21 16.31.19.jpg
    127.4 KB · Views: 342
  • 2015-03-21 16.30.16.jpg
    2015-03-21 16.30.16.jpg
    107.2 KB · Views: 330
So, I've been looking at that strip of Velcro that runs along the ceiling for the Arctic Pack and have been pondering its many possibilities.

Here's the first of what will be many more uses for it:

IMG_0424.JPG

IMG_0425.JPG

IMG_0426.JPG

I can simply attach this after I raise the roof and have a paper towel dispenser. The only problem I can foresee, if it's even a problem at all, would be how this will work when there's condensation on the walls, but I don't think that would a big deal.

I may use that Velcro strip for a hat rack, clothes hooks, utensil holders, etc.
 
On our east coast trip we found we put our shoes on the floor under the over hang on the drivers side cabinet. Soon we both had two pair of shoes out and the area was getting messy, also they slide around when we traveled. Here is the modification I made to hold our shoes.

Bought two 15" x 15" bicycle cargo nets at REI $6.95 ea.
med_gallery_1903_342_1517669.jpg

Took the metal hooks off and then used zip-ties to join them together making a 15" x 30" net. Installed cup hooks on each end of the over hang area to attach the net. I did put a cup hook in the middle bottom and on top, top center hook has a small bungie attached to it and the net.

med_gallery_1903_342_1645290.jpg


med_gallery_1903_342_783895.jpg


med_gallery_1903_342_1890051.jpg


You can see the small center bungie in the picture below.
med_gallery_1903_342_1857261.jpg
 
Had one small damage inside the camper on our east coast trip, the corner to the propane box. One of us hit the bottom of the corner and pulled off the "paper wood grain". Not a big problem but looked bad. I bought a 3/4" x 1/2" alum angle at HD and cut to fit. Used 4 screws to attach. Looks good and will protect the corner from more damage.

med_gallery_1903_342_1678147.jpg
 
billharr said:
Had one small damage inside the camper on our east coast trip, the corner to the propane box. One of us hit the bottom of the corner and pulled off the "paper wood grain". Not a big problem but looked bad. I bought a 3/4" x 1/2" alum angle at HD and cut to fit. Used 4 screws to attach. Looks good and will protect the corner from more damage.

med_gallery_1903_342_1678147.jpg


I've got a similar issue with the furnace/stove cabinet of the Eagle I just bought. I intend to do the same as you except I'll use clear plastic angle. The kind for protecting sheetrock corners. I have a couple of left over pieces from work on my kids new abode.
 
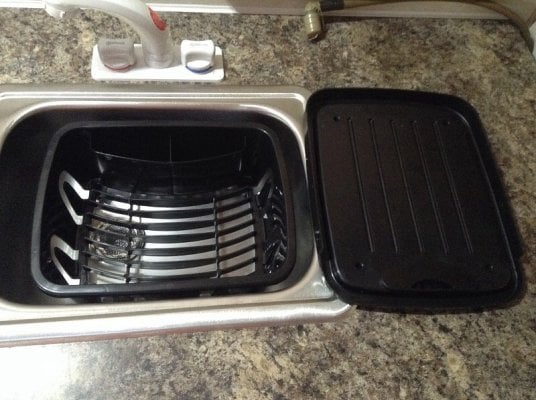
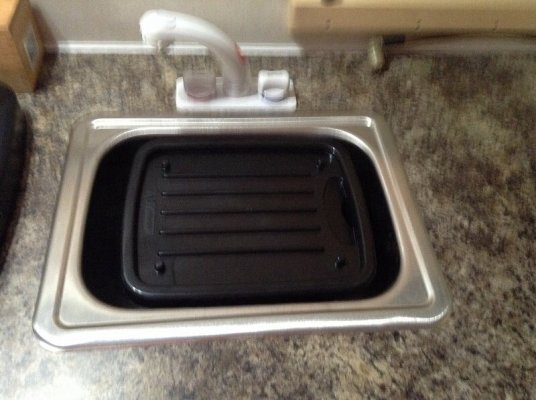
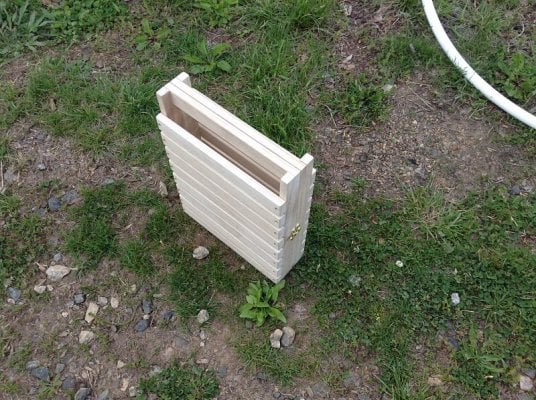
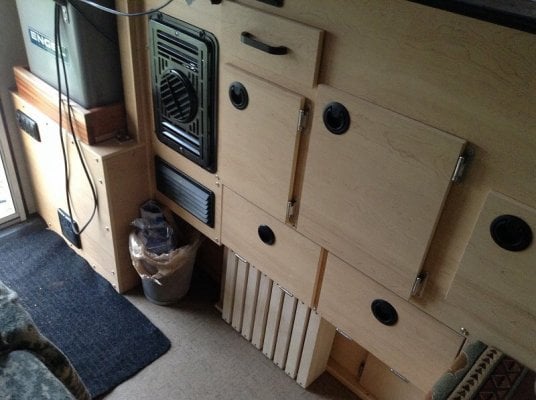
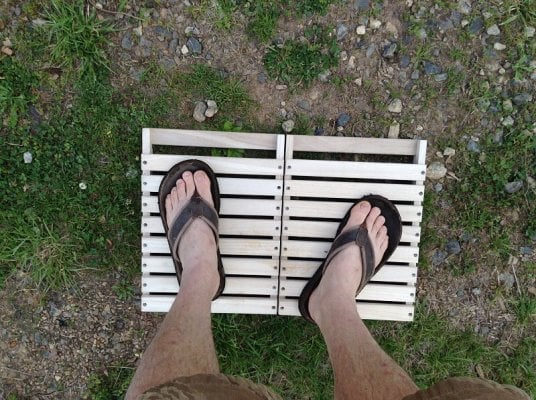
Some low cost additions. A dish rack with lid which fits in my sink from camping world and this folding shower platform made of Poplar. (Liriodendron tulipifera) It's very lightweight and fits under the cabinets in the Hawk. I may try to copy it in Southern Yellow Pine, (Pinus taeda) because pine doesn't rot as quickly as hardwoods do. I was originally thinking about using a hot water heater for a shower pan, but they are so wide and unwieldy-not good for storage. I use only biodegradable shampoo and soaps. Hopefully that's Treading Lightly?...1 of 3
 

Attachments

  • image.jpg
    image.jpg
    172.1 KB · Views: 397
  • image.jpg
    image.jpg
    142.2 KB · Views: 368
I bought one of those and it works well in less desirable campground showers, also. When folded up, there is room to carry soap, shampoo etc within it. Put them in a ziplock bag and free up a hand to carry clothes and towel.

As far as making it last, you could put a couple of layers of epoxy paint or gel coat on it.

Paul
 
Bombsight said:
Seems like priorities are constantly changing in the camping world. Because of this, I dont like drilling or screwing anything I dont absolutely have to. <--- that didnt sound right :unsure:

For everything else, there's this: http://www.amazon.com/Scotch-414-DC-Extreme-Mounting/dp/B009NP1JQC/ref=pd_sim_hi_1?ie=UTF8&refRID=04BYV0ZTTAYWQ9CT7V2G
I hear you. We've had good luck the the 3M Command strips and hooks. I even mounted a little Command spice rack behind the sink counter that has stayed put.
 
Lighthawk said:
I hear you. We've had good luck the the 3M Command strips and hooks. I even mounted a little Command spice rack behind the sink counter that has stayed put.
How do those tape strips work when the camper is really hot in the summer?
 
GroovyDad said:
How do those tape strips work when the camper is really hot in the summer?
Anything made by 3M works very well for it intended purpose.
... and I dont just say that because I make the glue. :D
 
Bombsight said:
Anything made by 3M works very well for it intended purpose.
... and I dont just say that because I make the glue. :D
I have an intimate relationship with 3M, their lawyers threatened to sue me :p
It's a long story... and I don't want to get sued by a 100+ billion dollar company, so I'll leave it at that.

I agree, they make the best products on the planet.
 
Here is my low-cost dust cover for the water heater. Mine is on the back wall so it gets caked in dust which I believe was the death of the original thermostat/controller unit in the water heater that I just replaced. I got a car door magnet like you use for a business ad on the side of your vehicle and cut a piece to go over each vent. For the left side vent louvers the magnet is on the inside, for the big screened vent the magnet goes on the outside. I've been driving around for weeks with them and they stay on just fine. I just need to remember to take them off when I fire up the water heater. You can find this stuff on line for several dollars per sheet.

dustcover.JPGdustcover2.JPG
 

New posts - WTW

Back
Top Bottom